
Build a real estate website
Build a real estate website with Bricks and ACPT
This short tutorial will show how to create a real estate website using Bricks Builder and ACPT entirely from scratch.
Create custom fields for the property post type
Create a new meta group and assign it to the Property custom post type.
Then, create a meta box called basic_info containing a bunch of fields.
Fill in the custom fields and click Edit with Bricks
Fill in all the required data for this property listing in the custom fields under the 'basic_info' box.
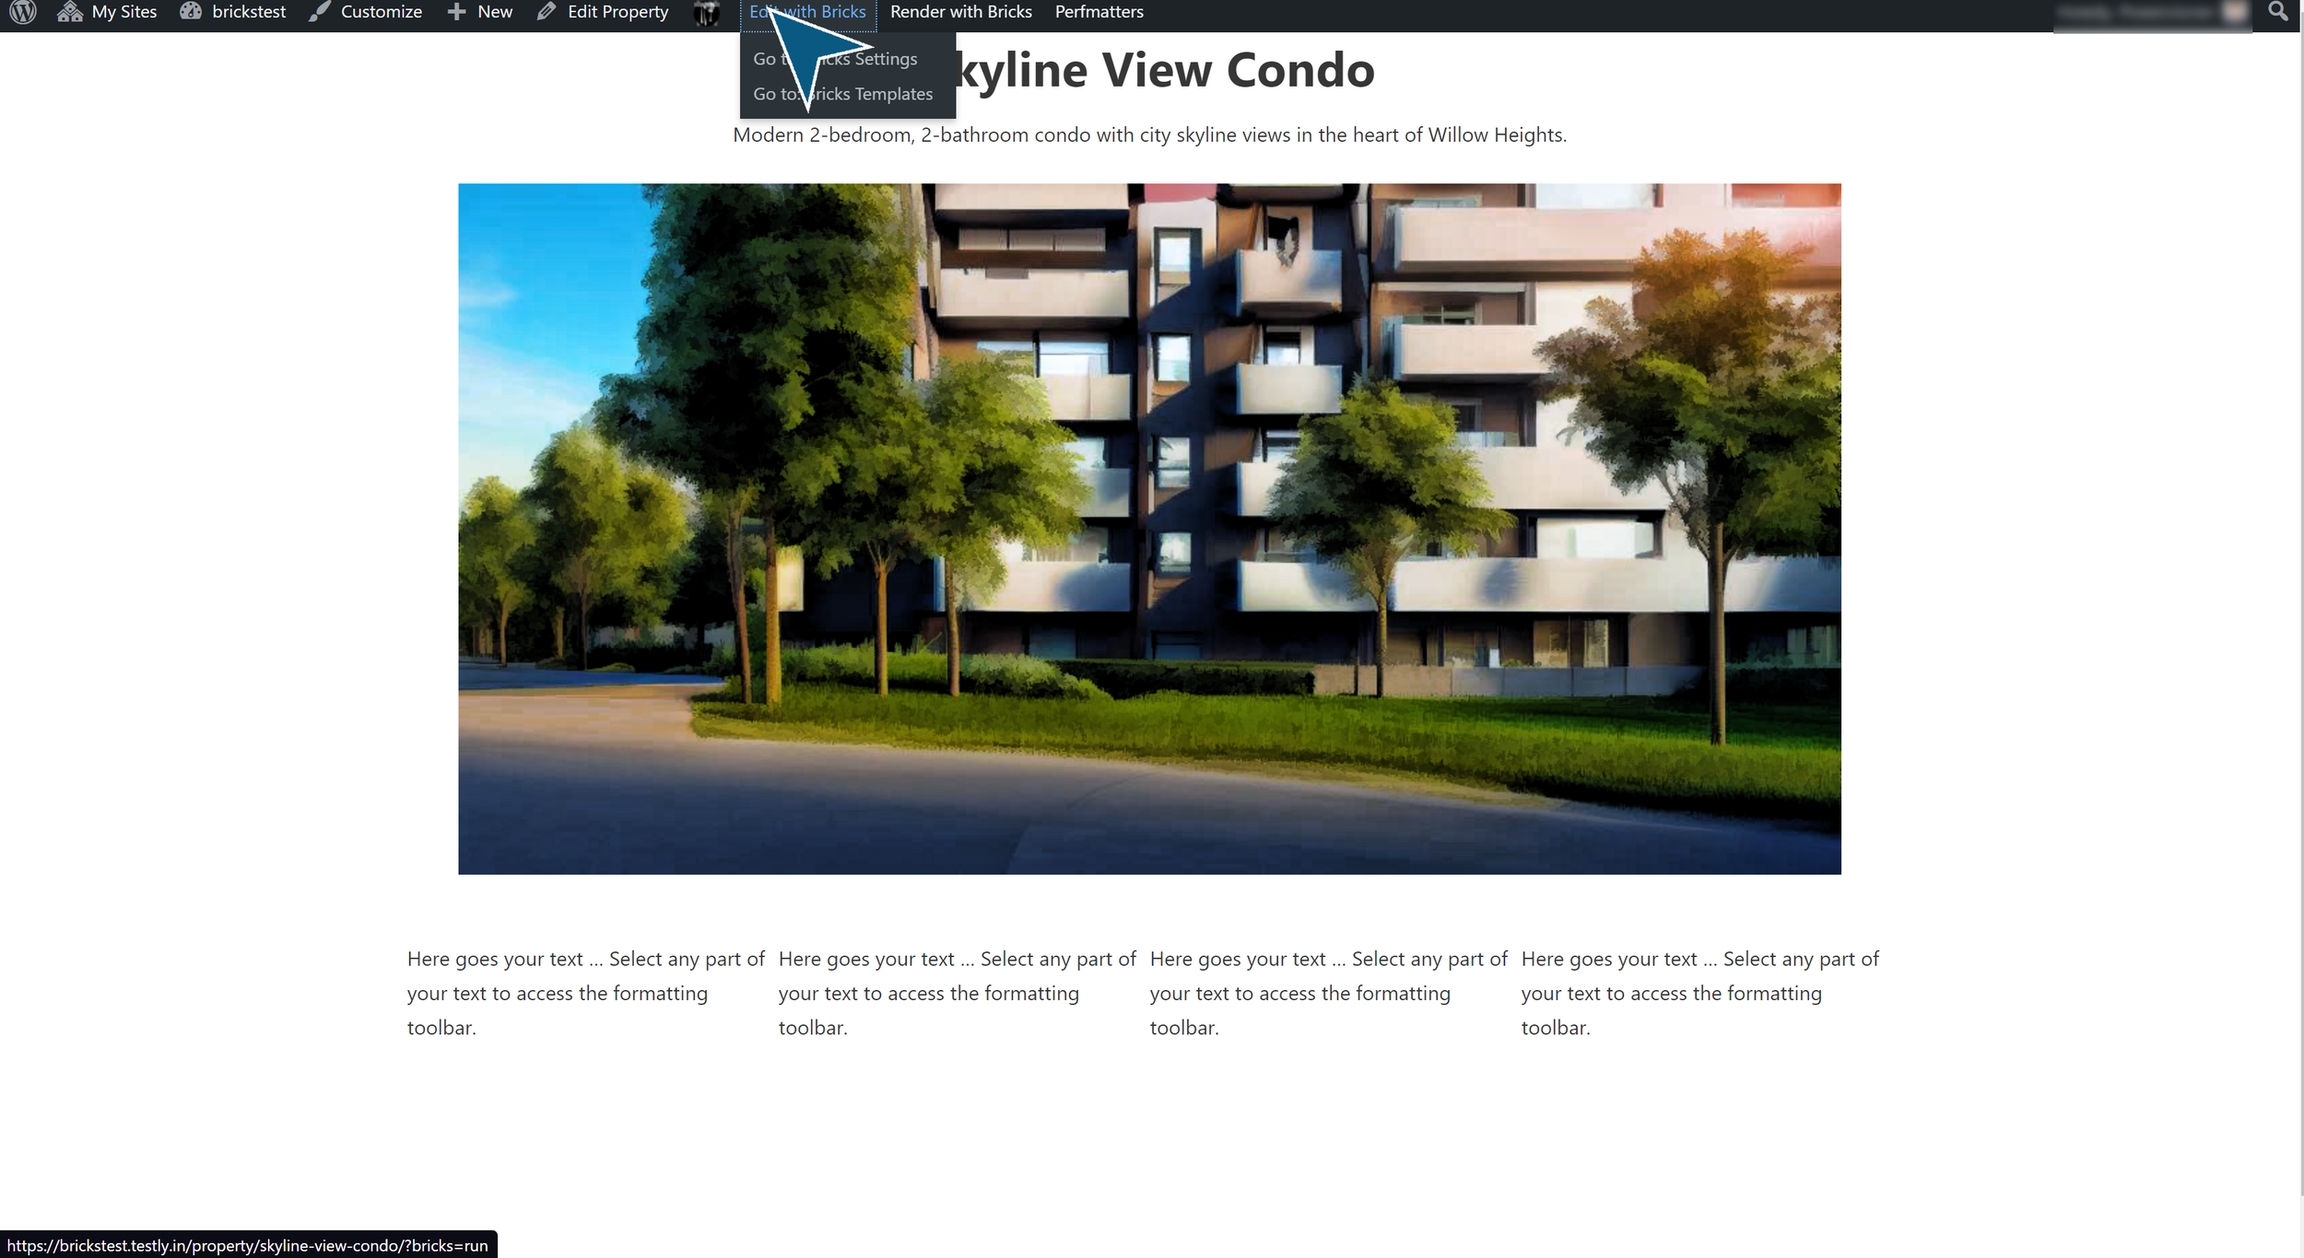
Now, publish the post, then click Edit with Bricks, and try to view the post from the front-end or in the Bricks editor.

Uh, oh! Can't see my post!
It is very common to find that the first time you try to view a new custom post, all you get is a message 'invalid post type'.
This is something we have been tackling with all kinds of custom post plugins since custom posts began to be used in WordPress.
Don't panic, here's how to fix the problem:
Go to WordPress Settings - Permalinks
Select 'Plain' as your permalink structure - Select Plain as permalink structure and then Save.
Now, select the permalink structure you want - Select the permalink structure that you have or want to use.
Now you should be able to see your saved post!
Back to your post, use ACPT fields in Bricks
Click Edit with Bricks to view it in the Bricks editor. Let's get started with Bricks:

After adding the title and centering it, we'll start to add the ACPT fields to the page.
Displaying the custom post matter in Bricks - Adding an image field
Add a Container to the new Section.
Drag the Image pin from the left-hand pane into the Container.

At this point you can select the image either directly from the media library through 'Select Image'.
Or, you can pull the image through two other options, through 'dynamic data' using the lightning icon, or from an external url using the option for that.
Here, I had already created a custom image field when creating the meta box, and added the property image when filling in the data on the custom post.
So, I click the lightning icon for dynamic data.
Then select the property image field.

The image now appears in the editor area, but left aligned.
I center it from the Style tab.
Now, I have the Title and the Image of the property in the editor area.
Displaying the custom post matter in Bricks - Adding text above the image
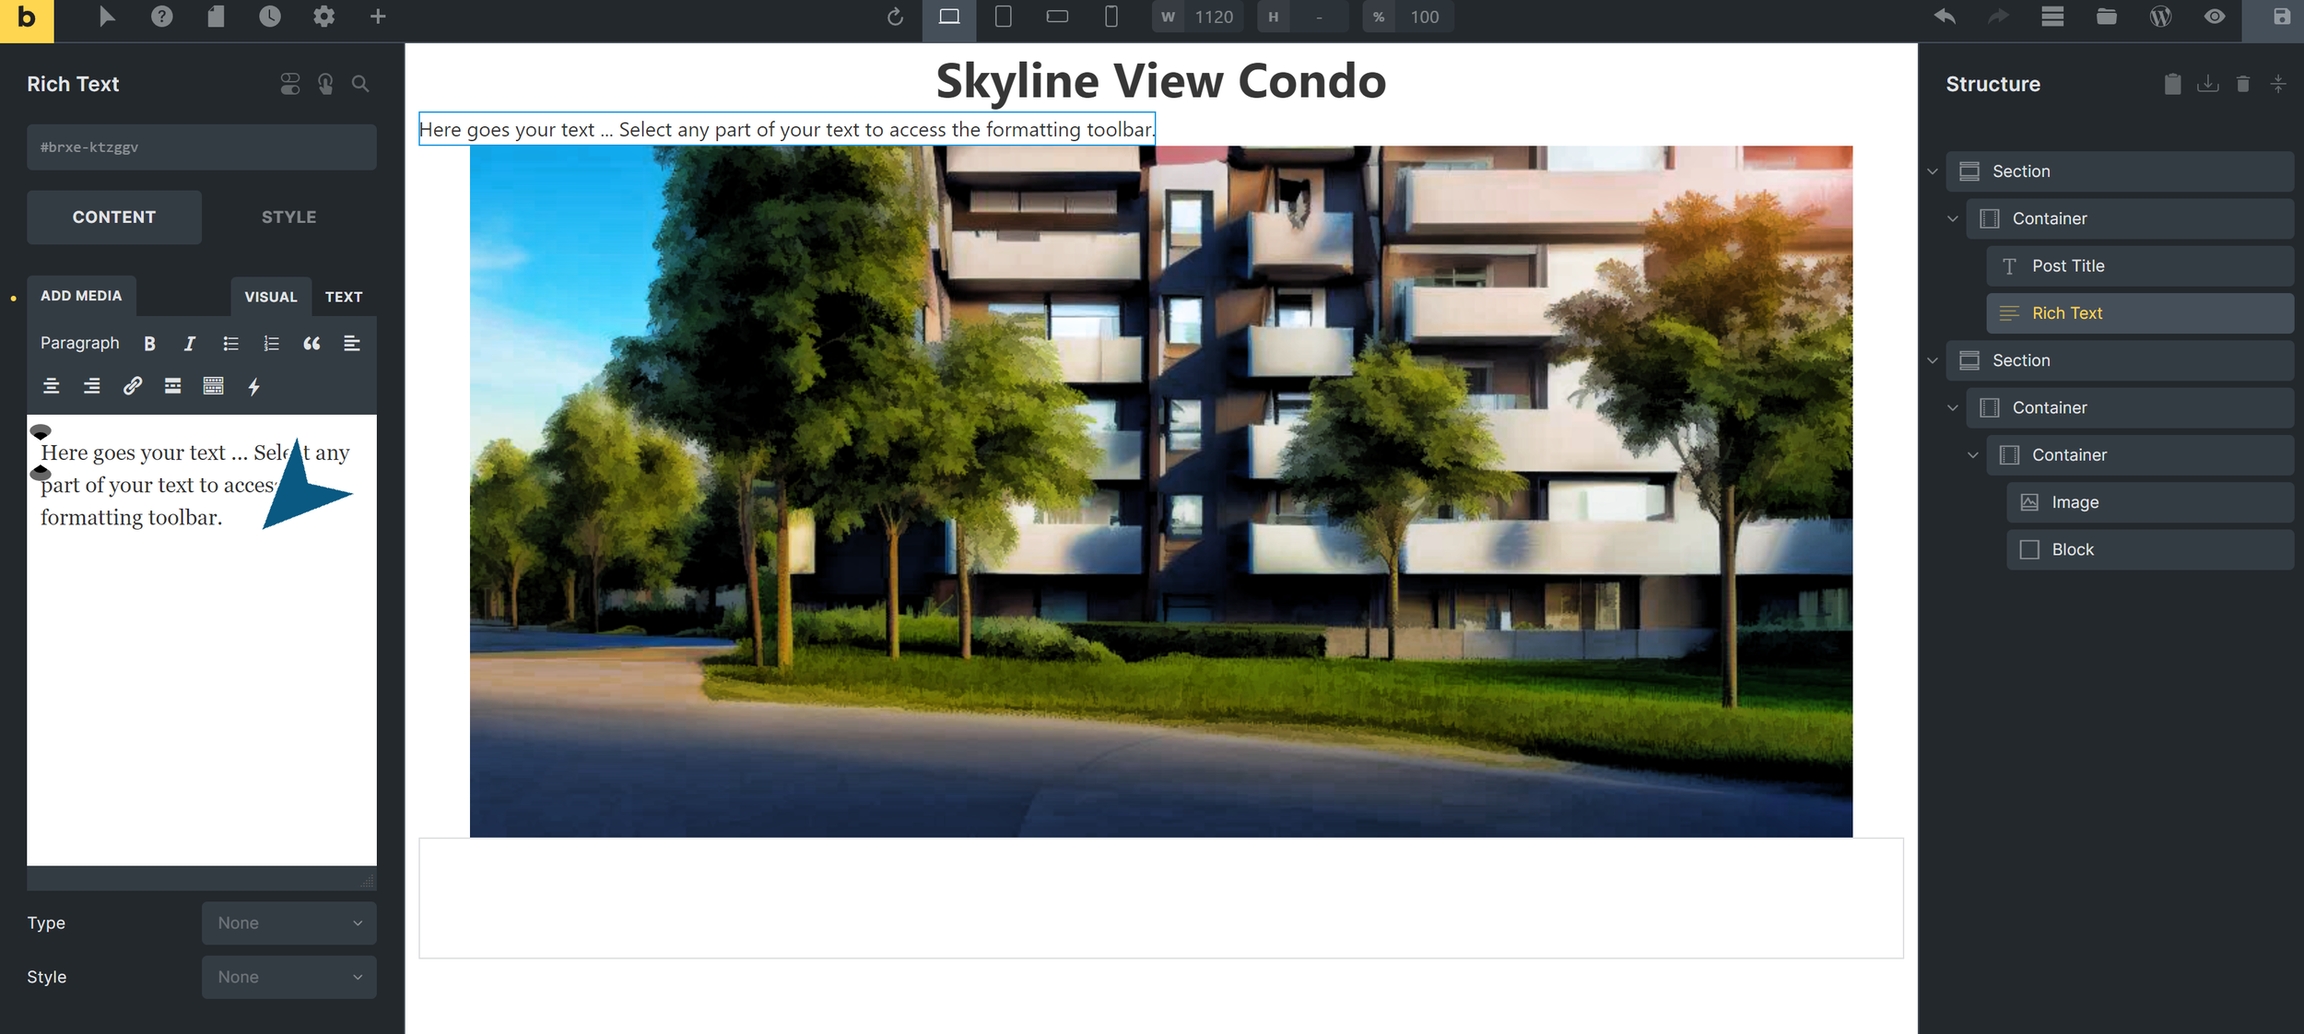
I want to add a short description of the property above the image and after the title.
So, I drag a Rich Text pin from the left-hand pane into the top container above the image and place the Rich Text under the post title in the same container.

Adding dynamic data through Rich Text
You can put in almost all custom field data through the Rich Text (RT) pin, except for images and videos.
Once the RT pin is placed in position, click it and on the left-hand pane you'd see it open up.
Click the lightning icon to find and select custom field
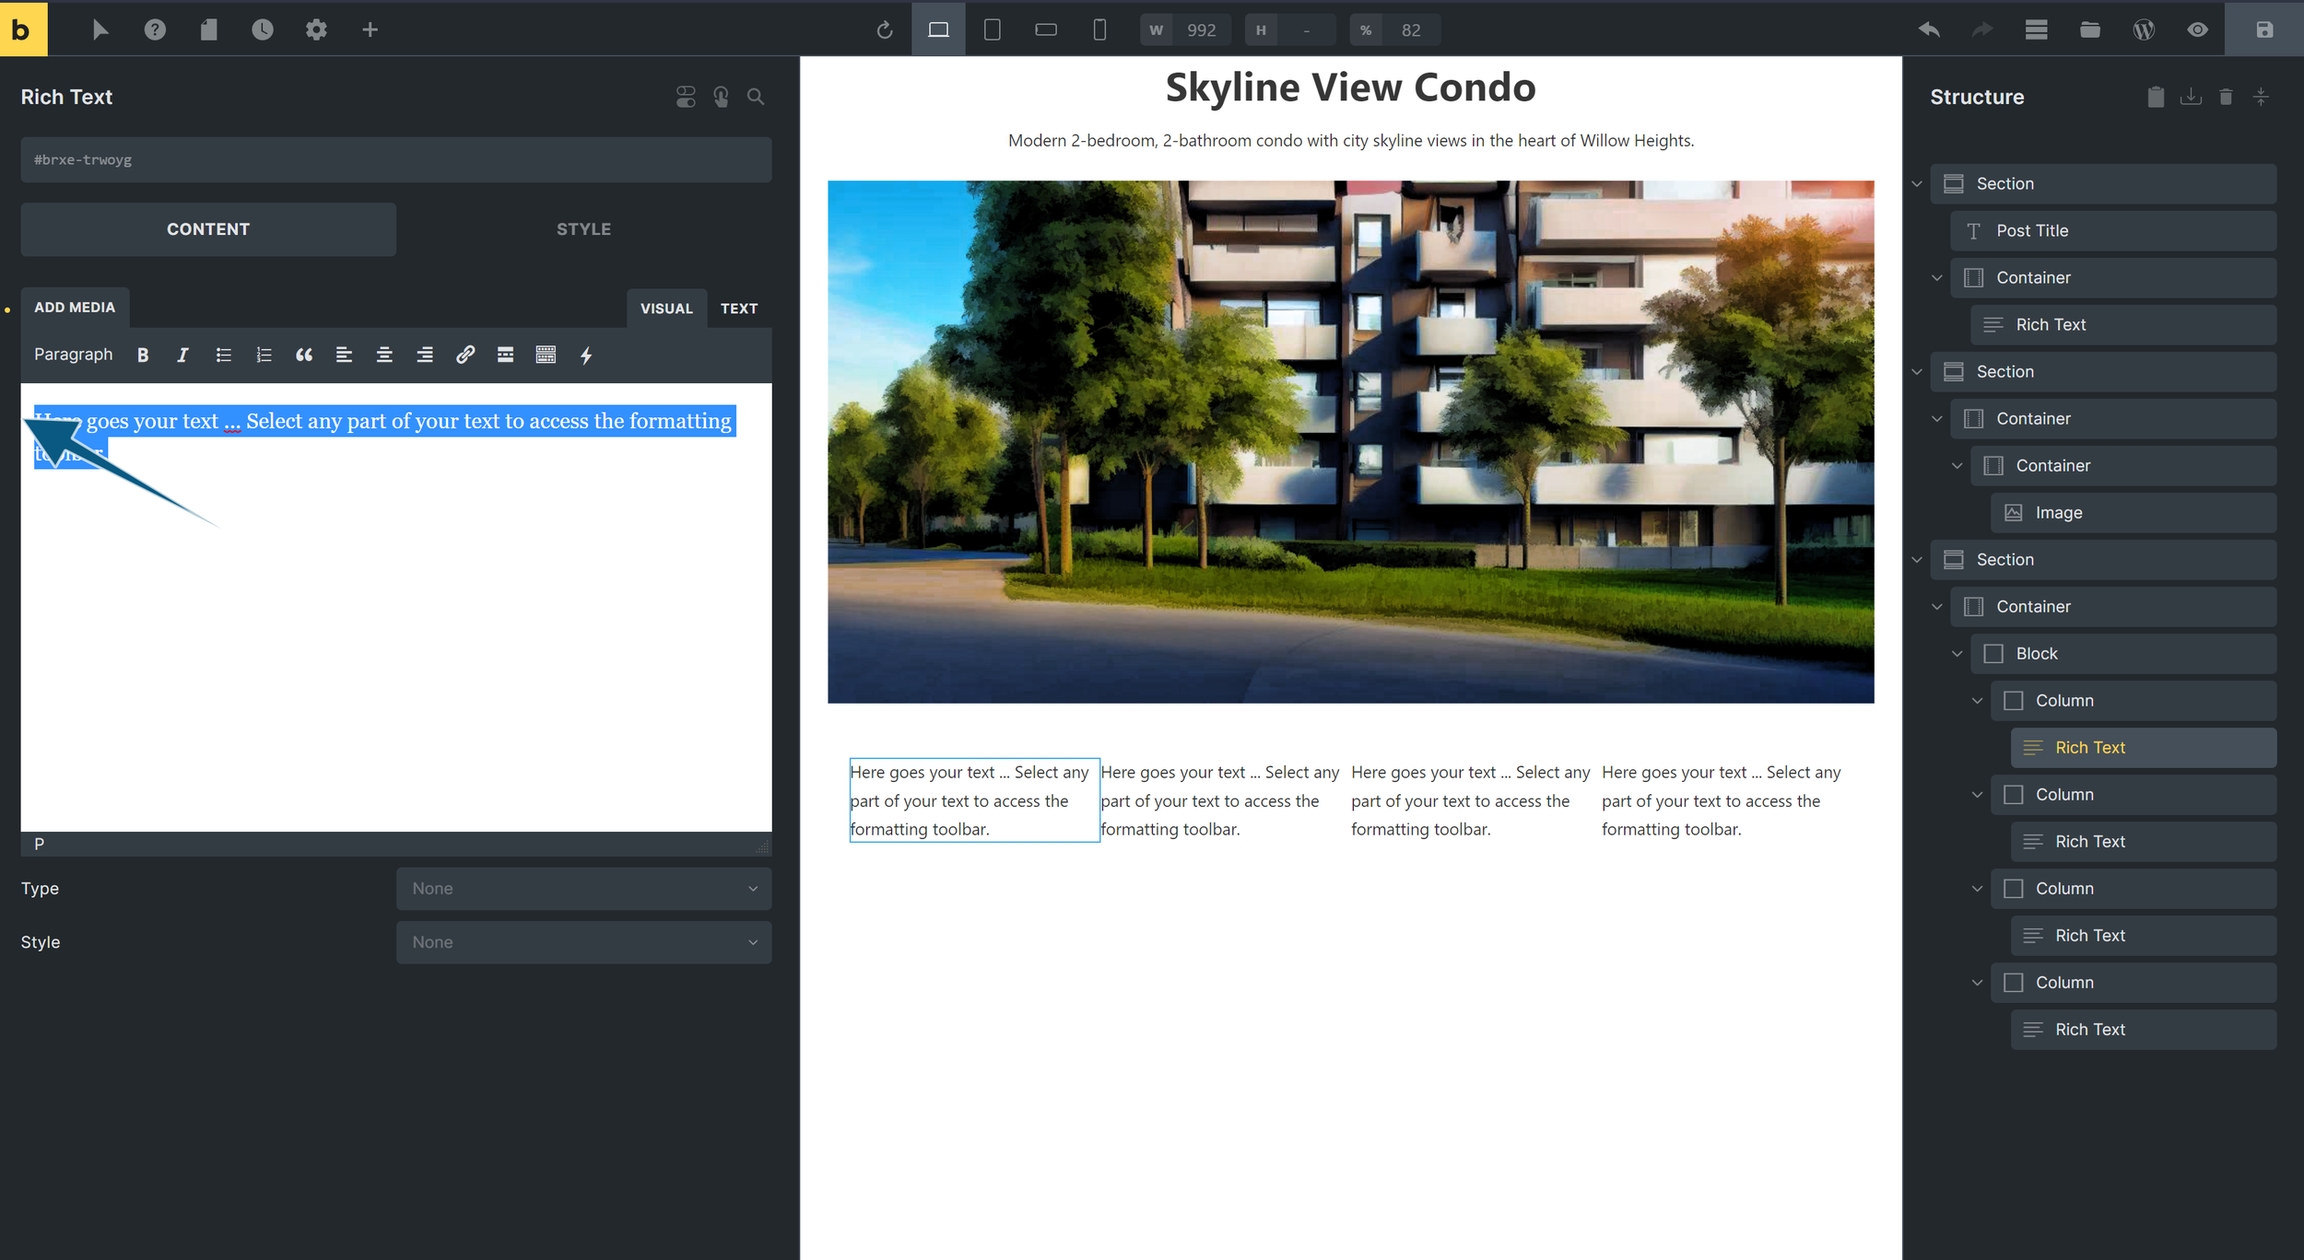
Remove the placeholder text under the Content - Add media - Visual tab.
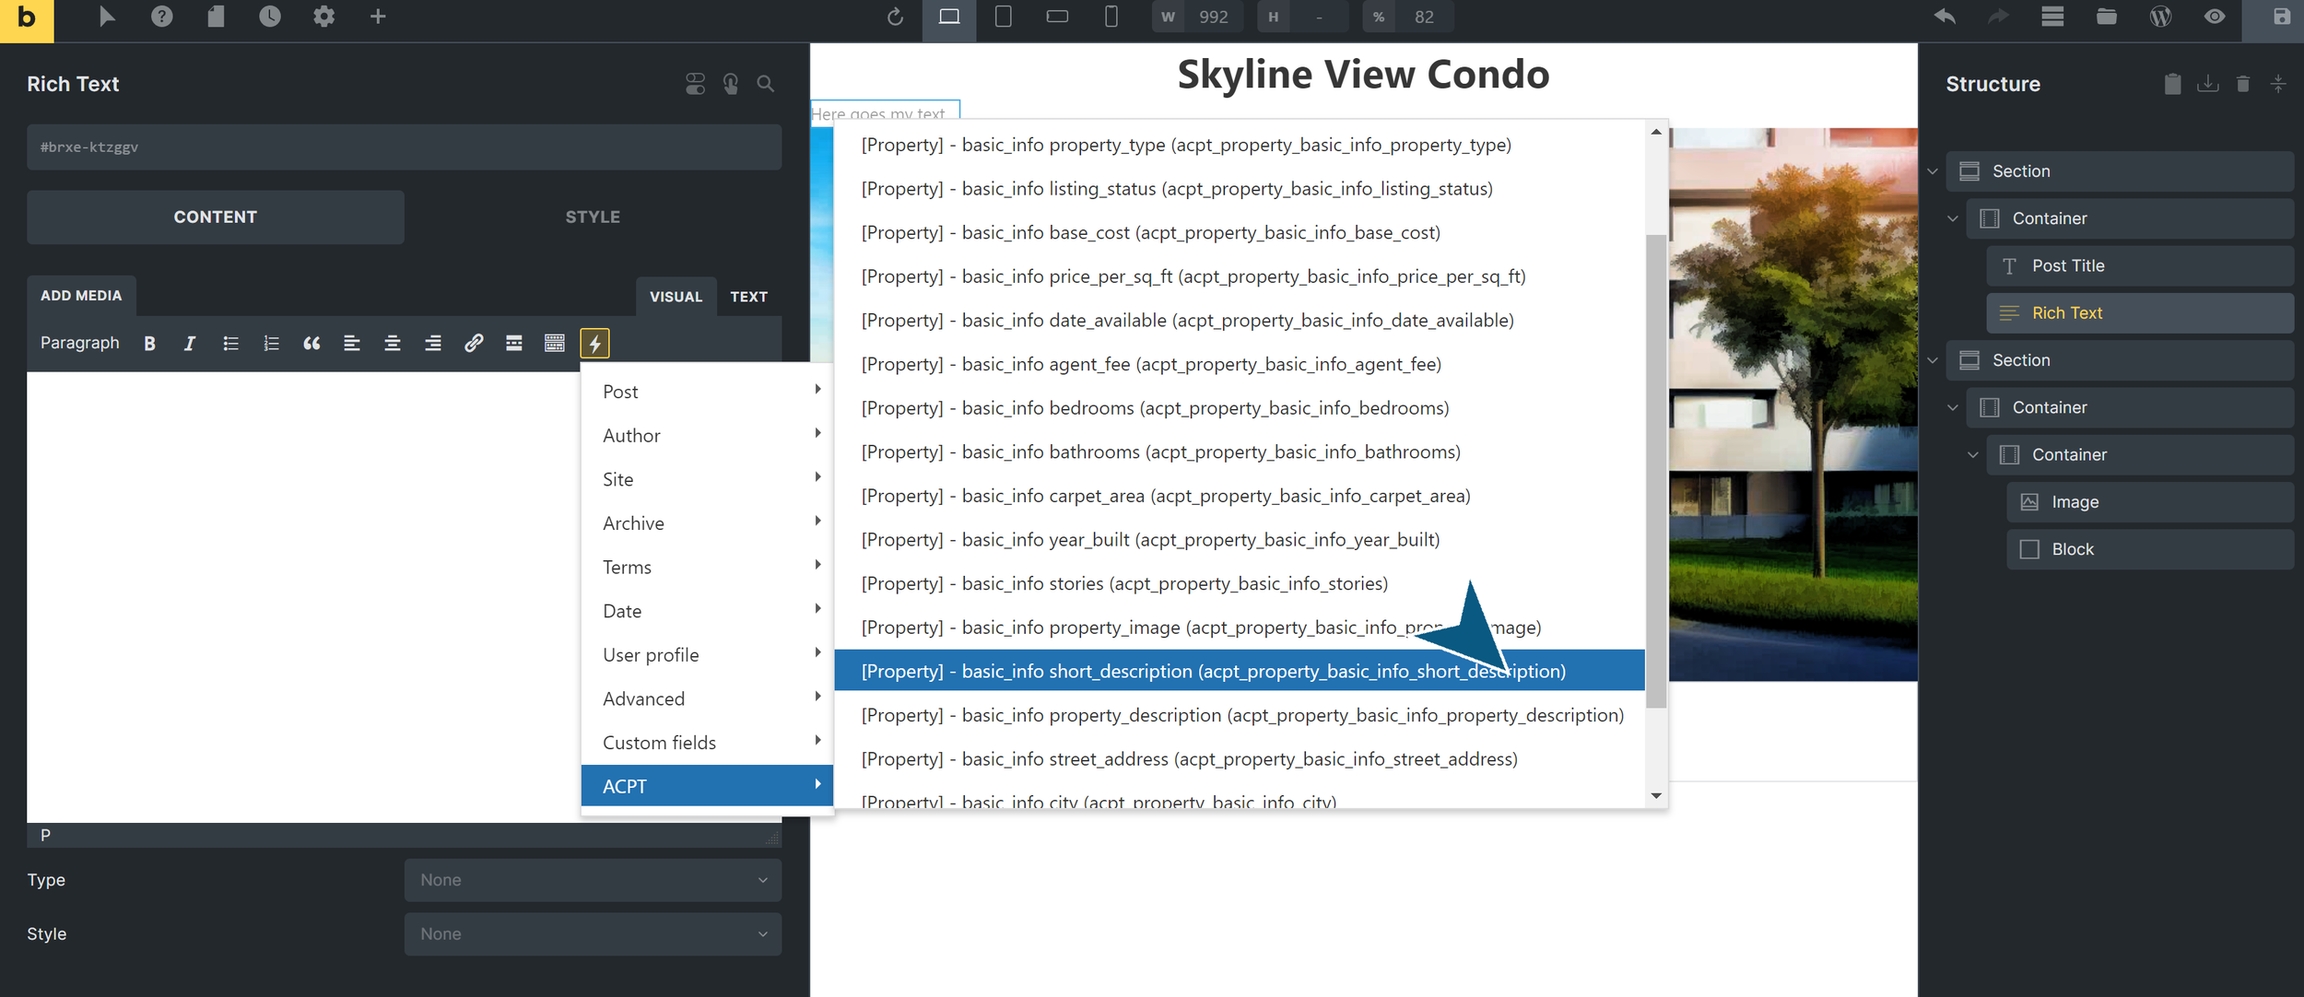
Click the 'lightning' dynamic content icon.

Select your custom field for the text you want
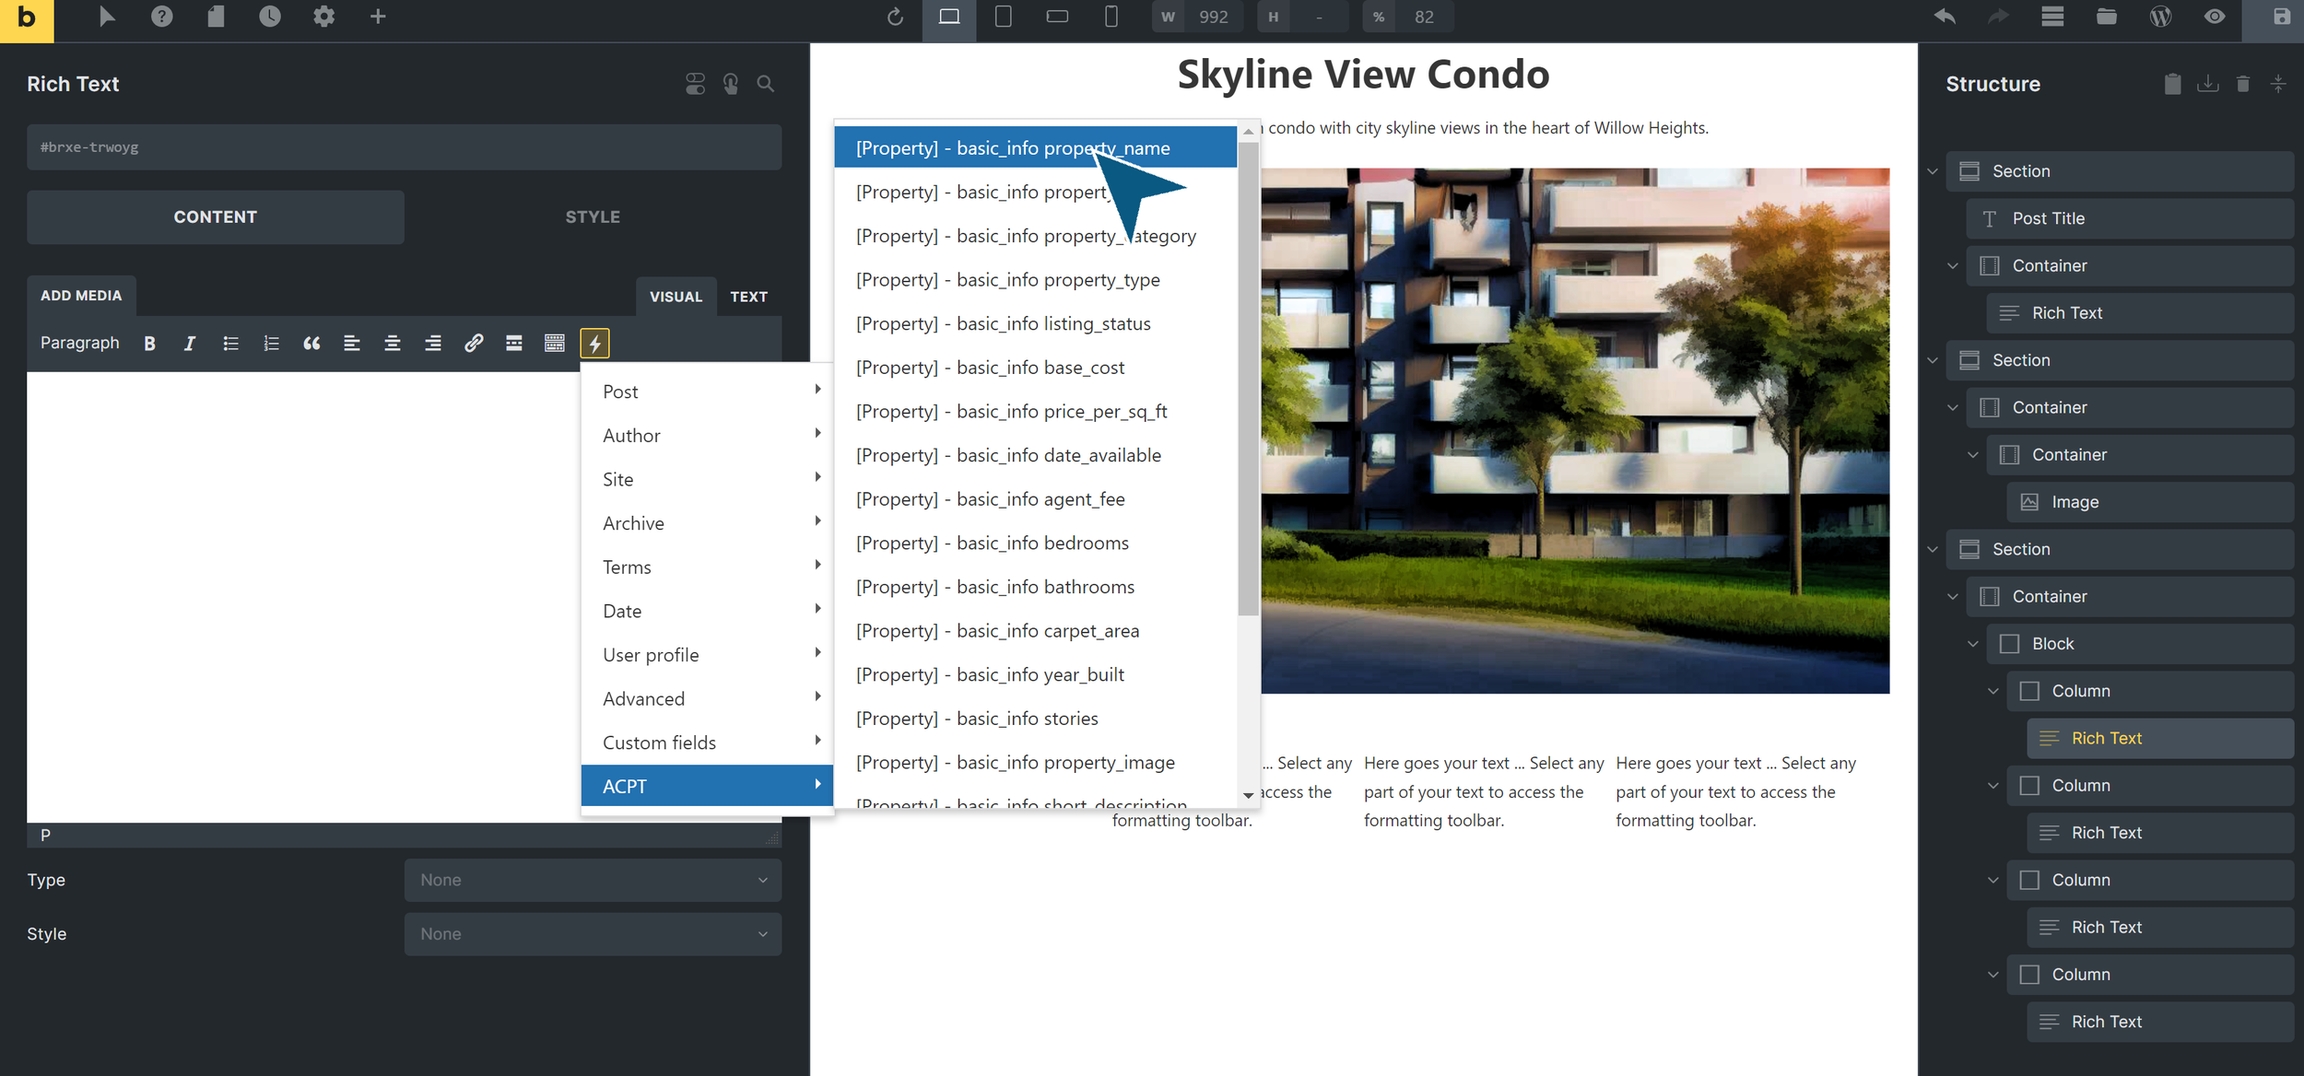
Scroll down to ACPT and select the field you want.
In this case I had created the 'short description' field in the 'basic_info' meta box, and I select that.
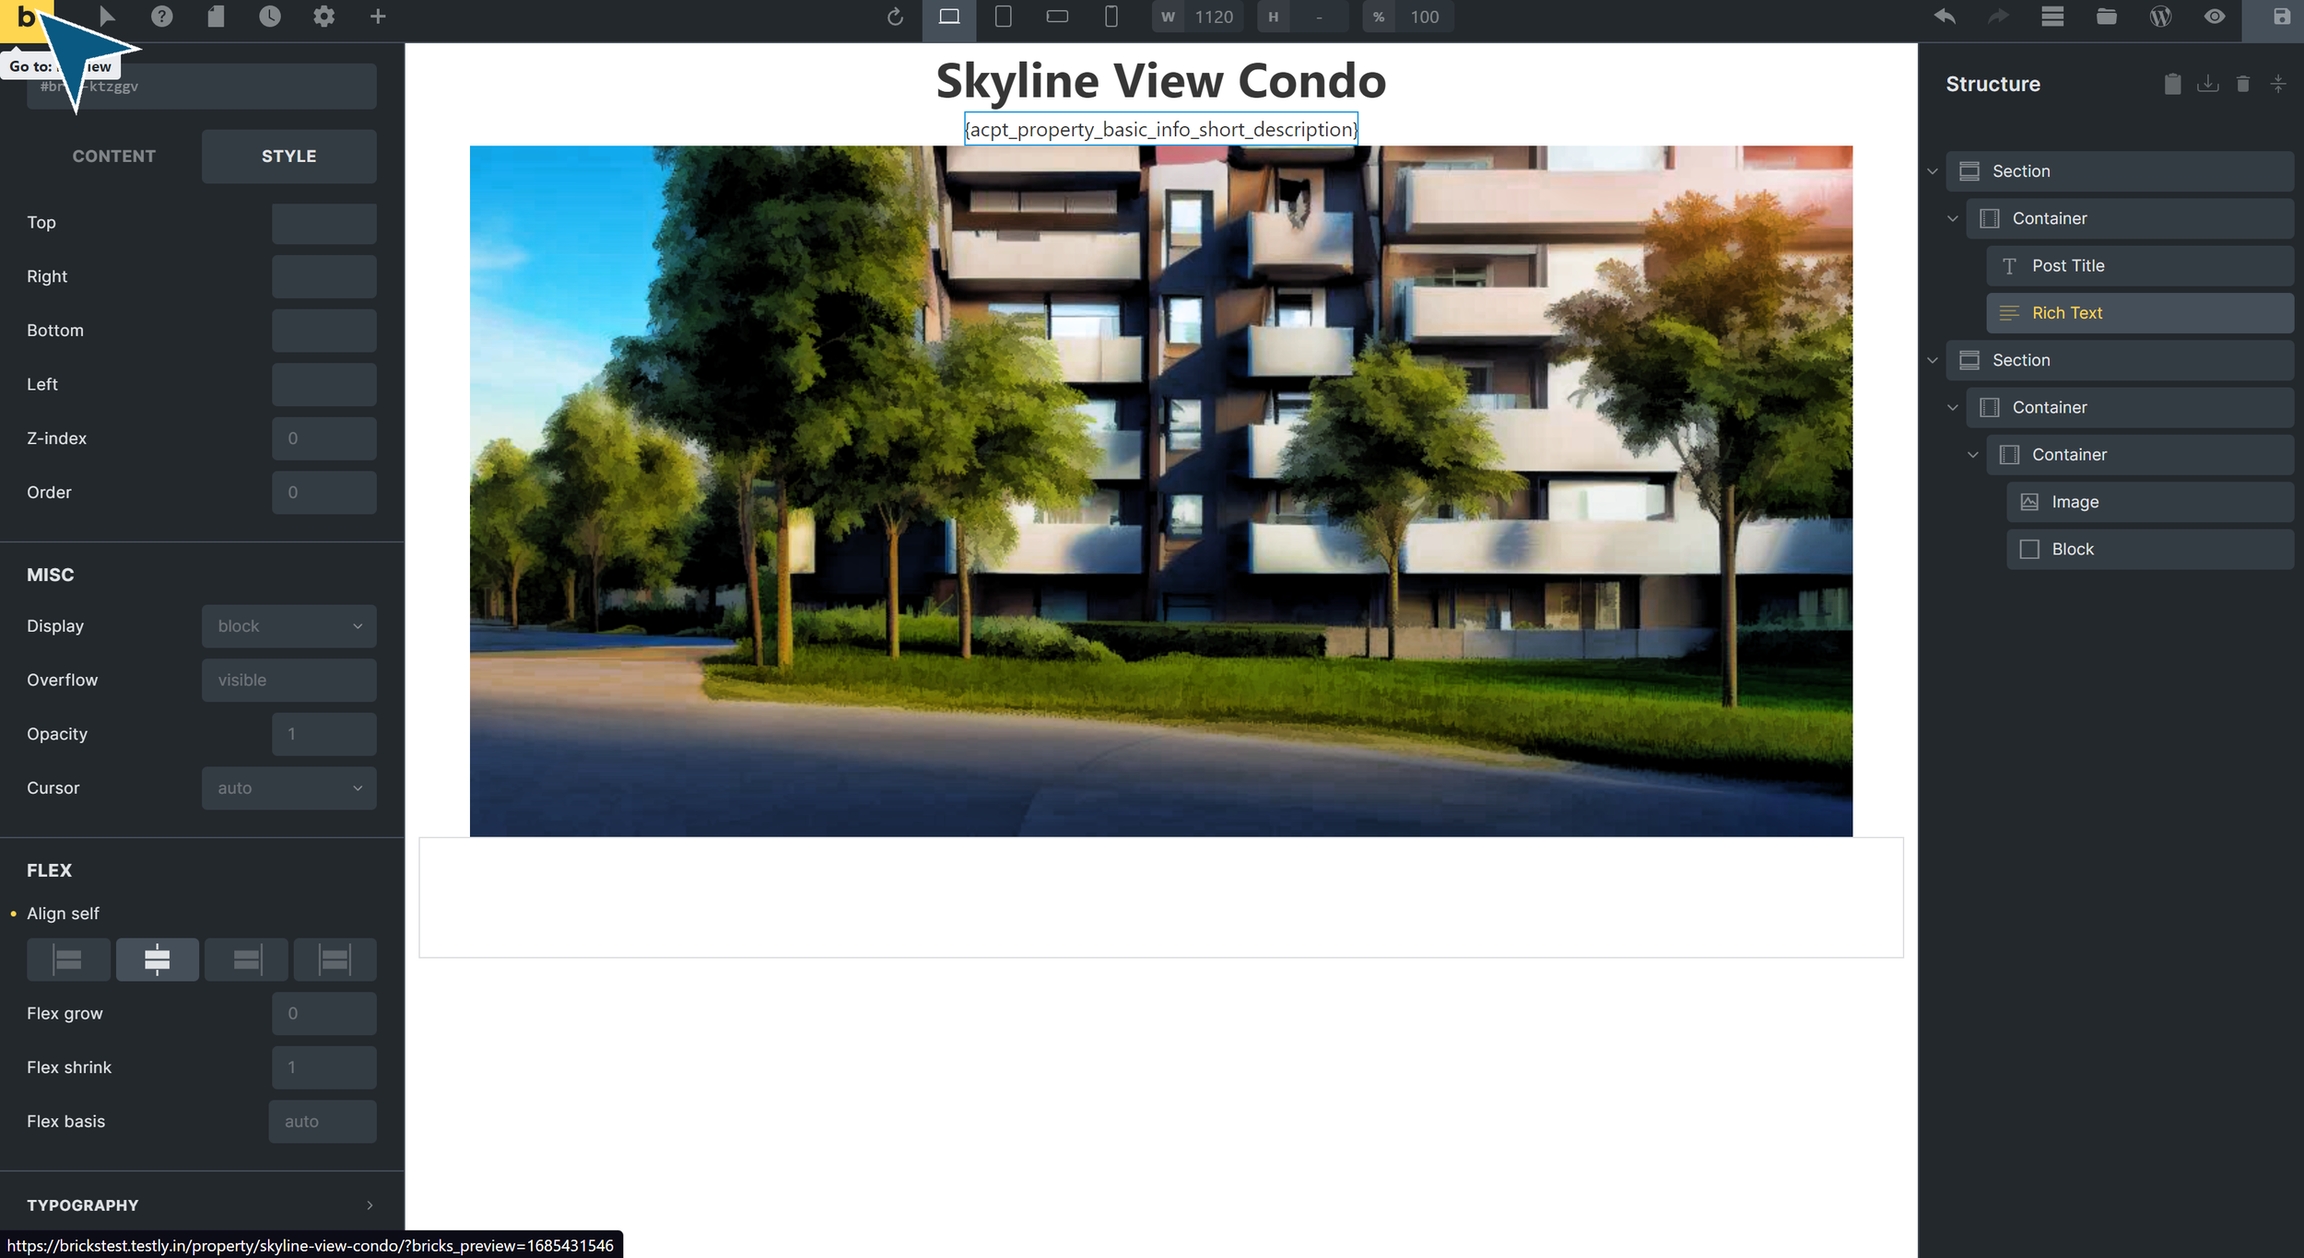
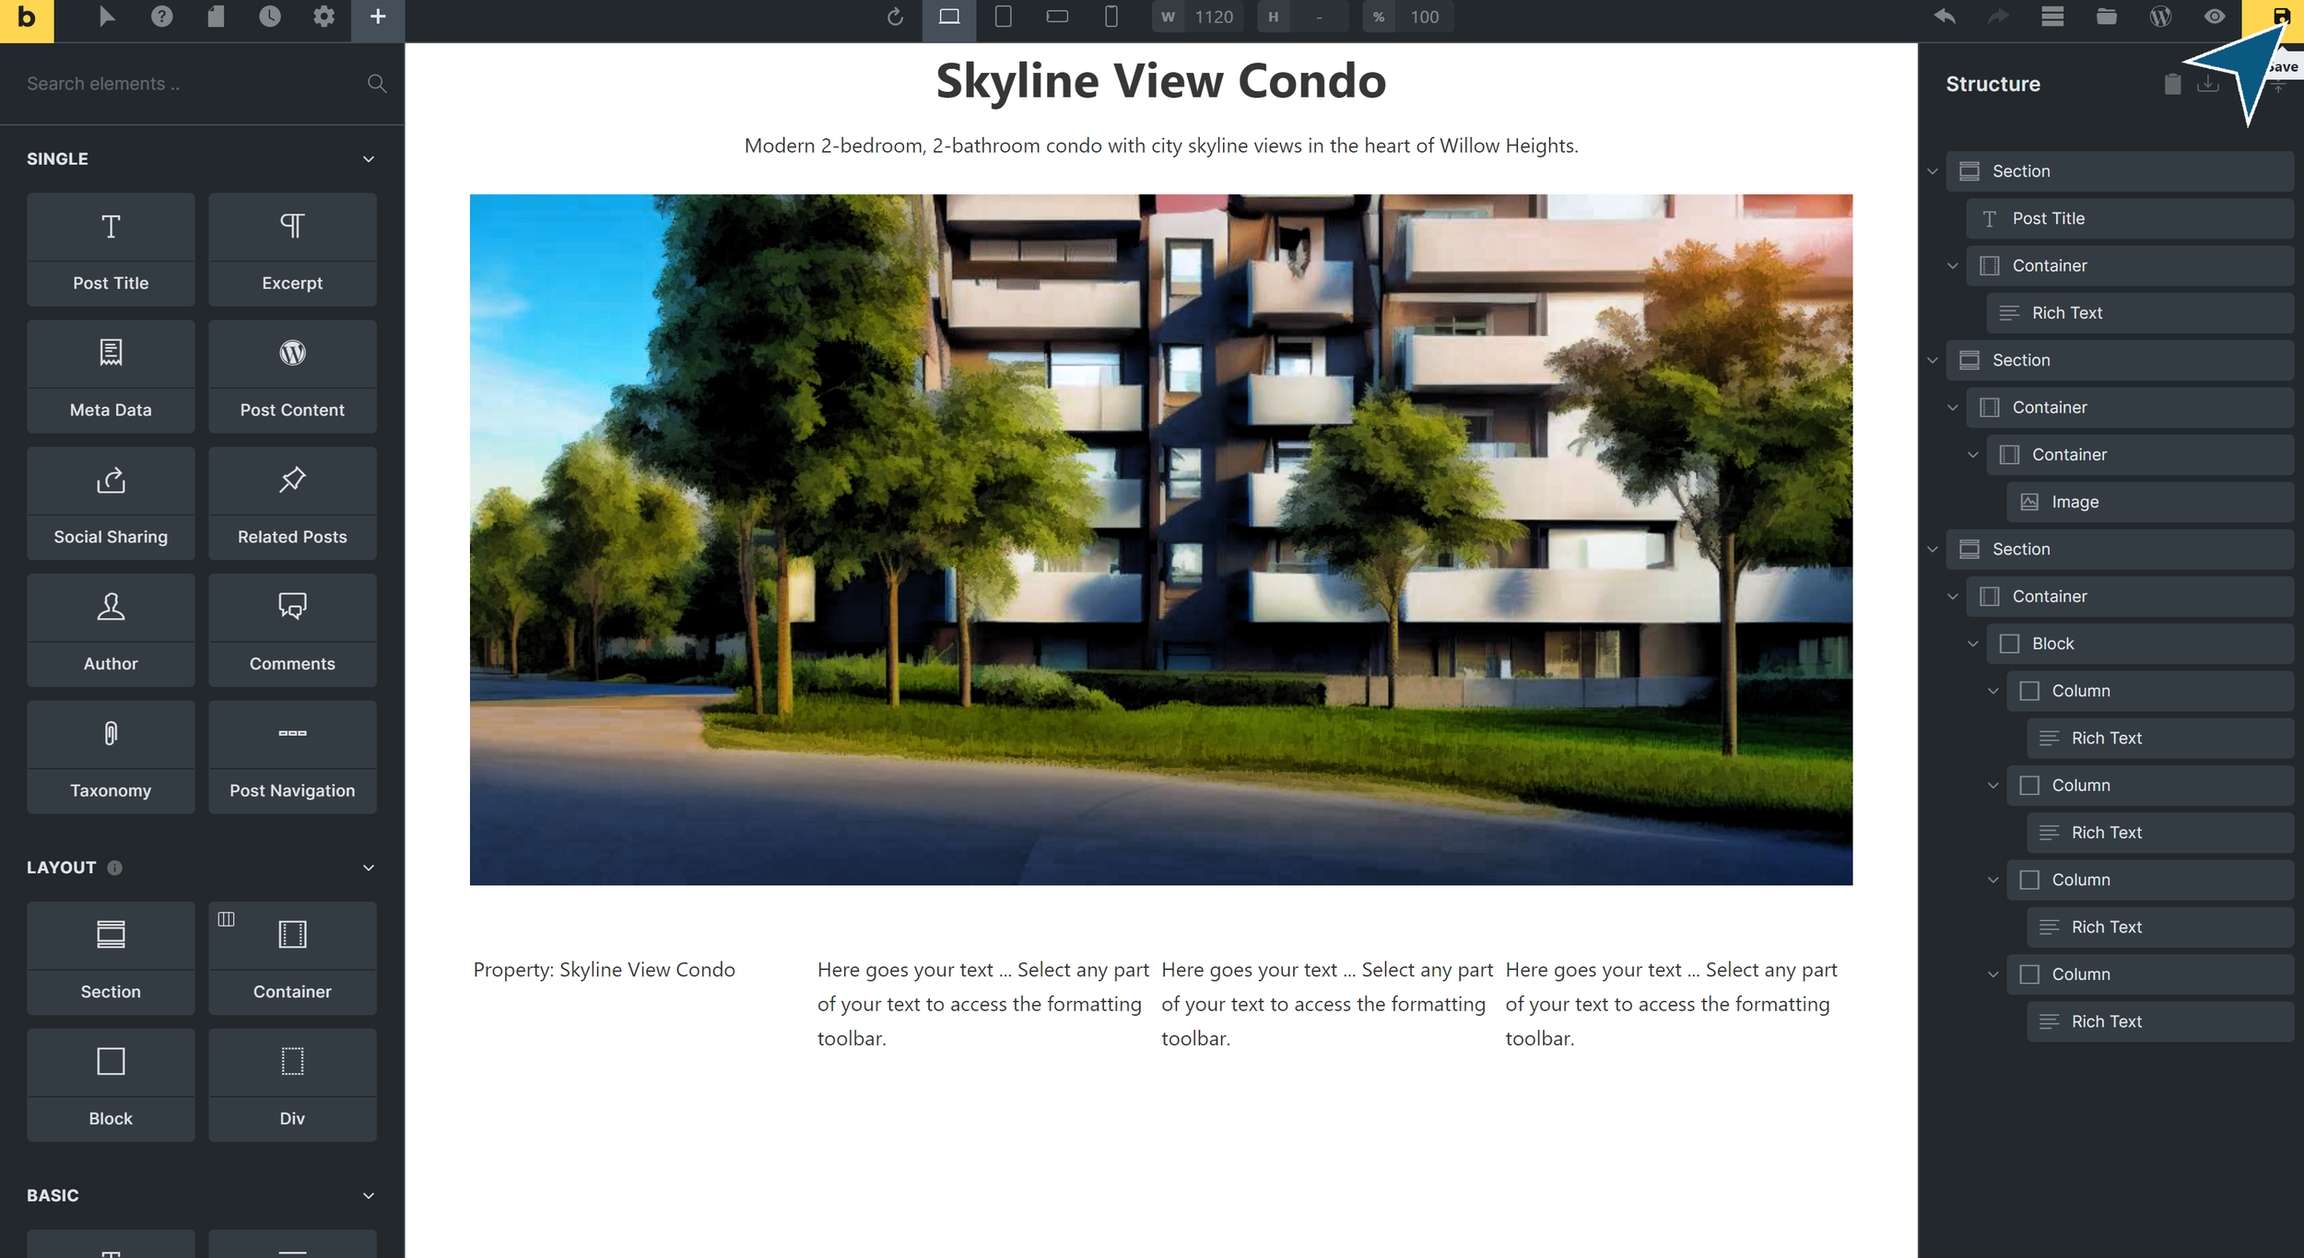
Align field and check Bricks render
I align the field to the center, press the 'b' icon on the left top corner and check how it's rendering.
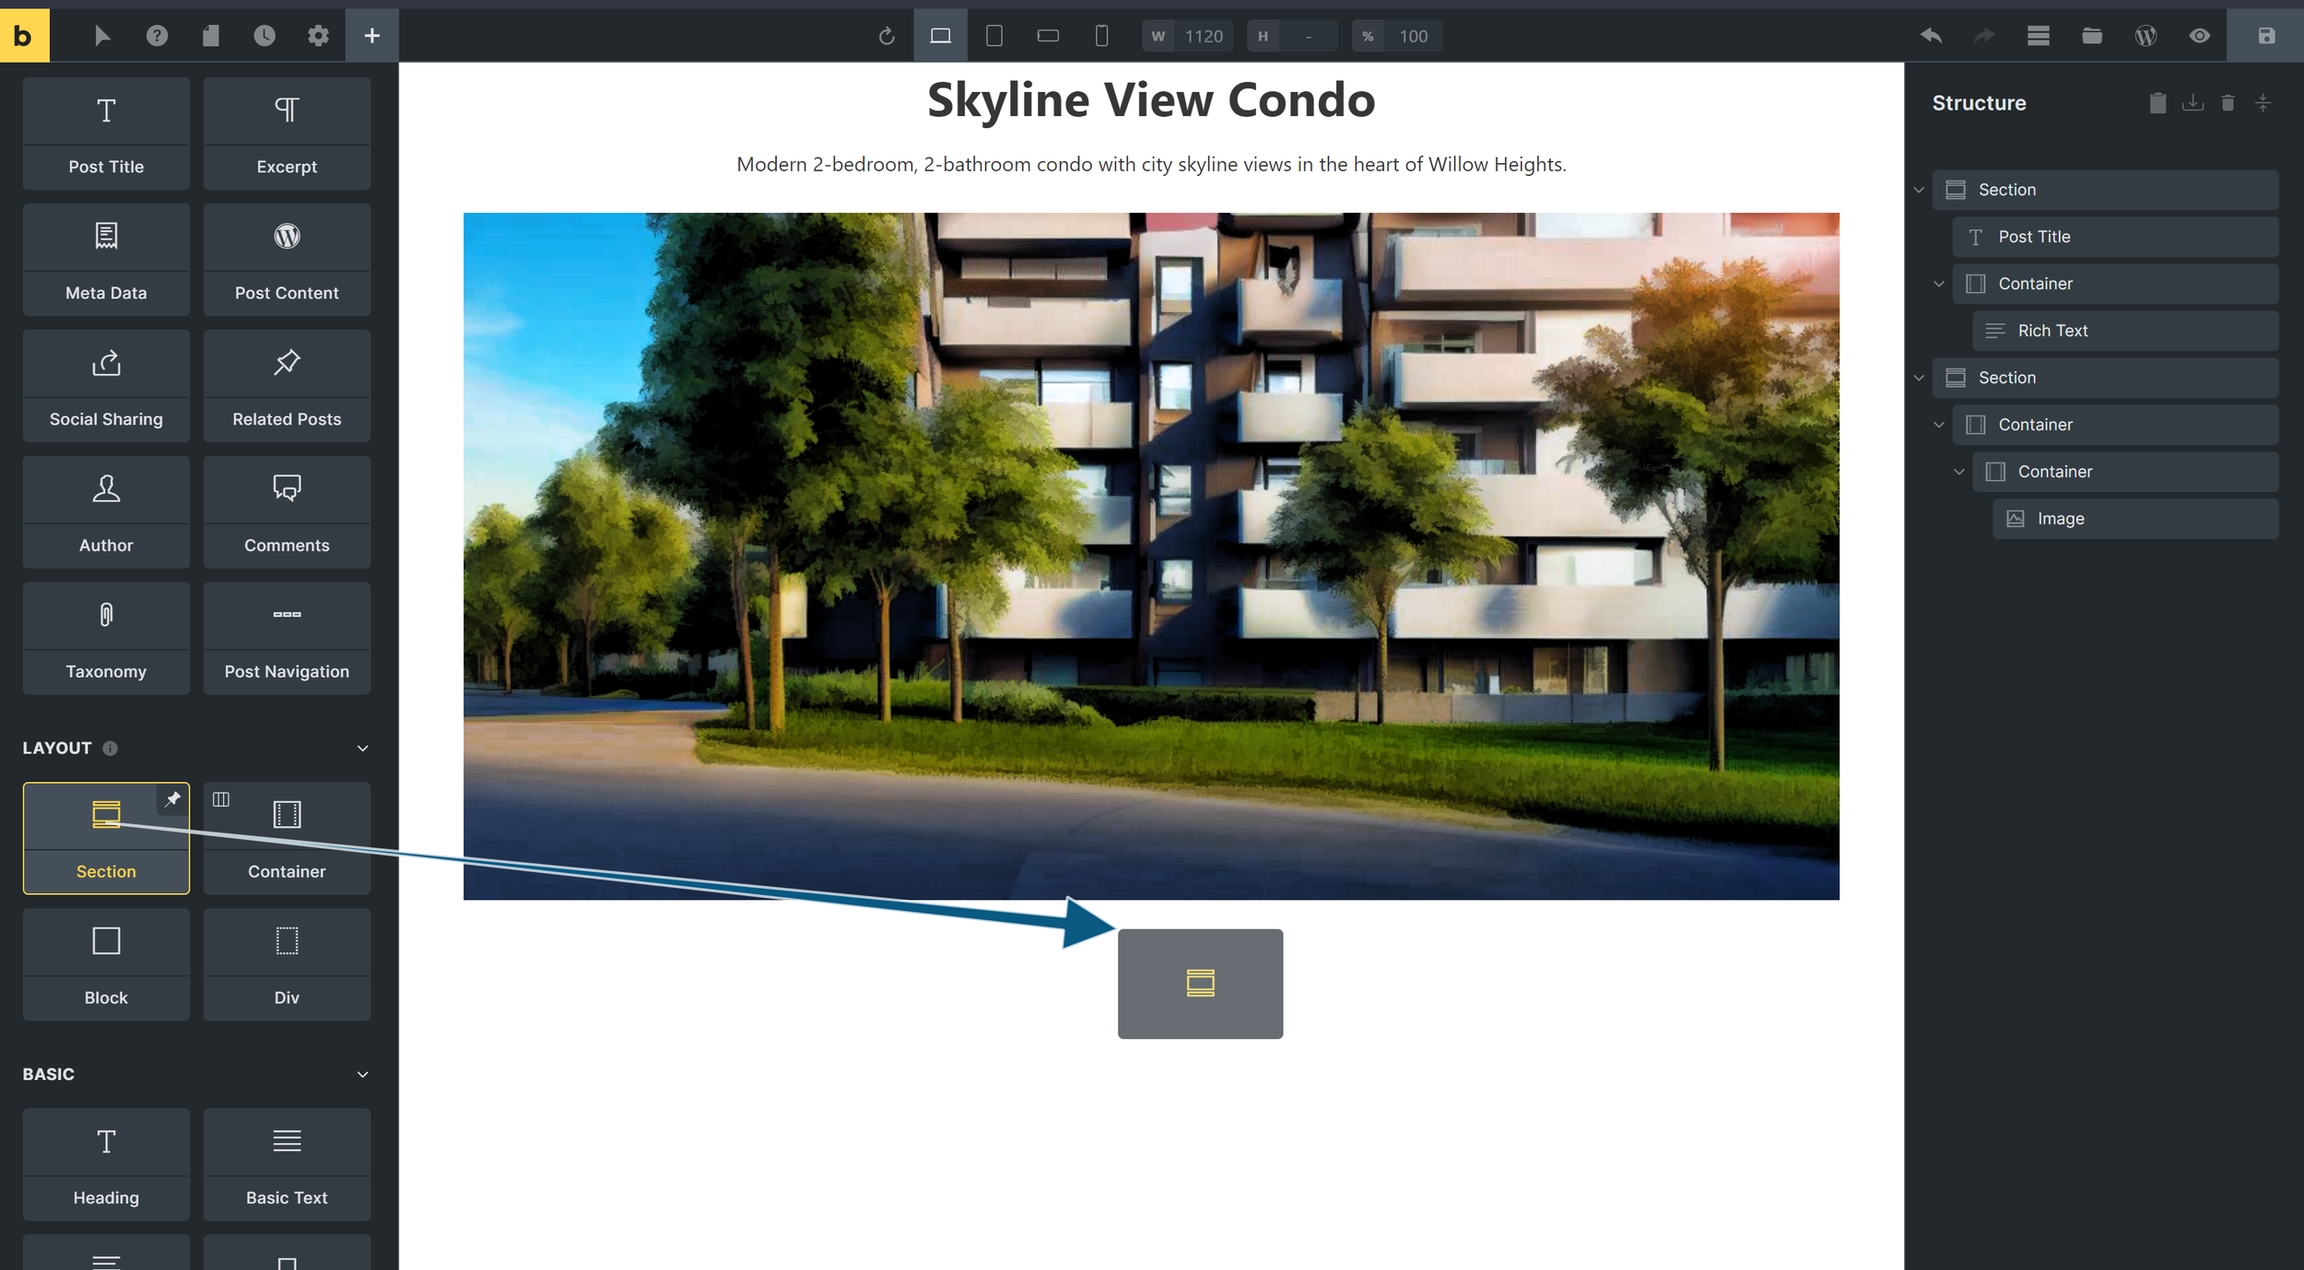
Displaying the custom post matter in Bricks - Displaying more custom field data
In Bricks, adding custom field text data from ACPT custom post is almost the same in every case.
You first add a new Section.
Add a container and a block
You add a container or a block in a Section.
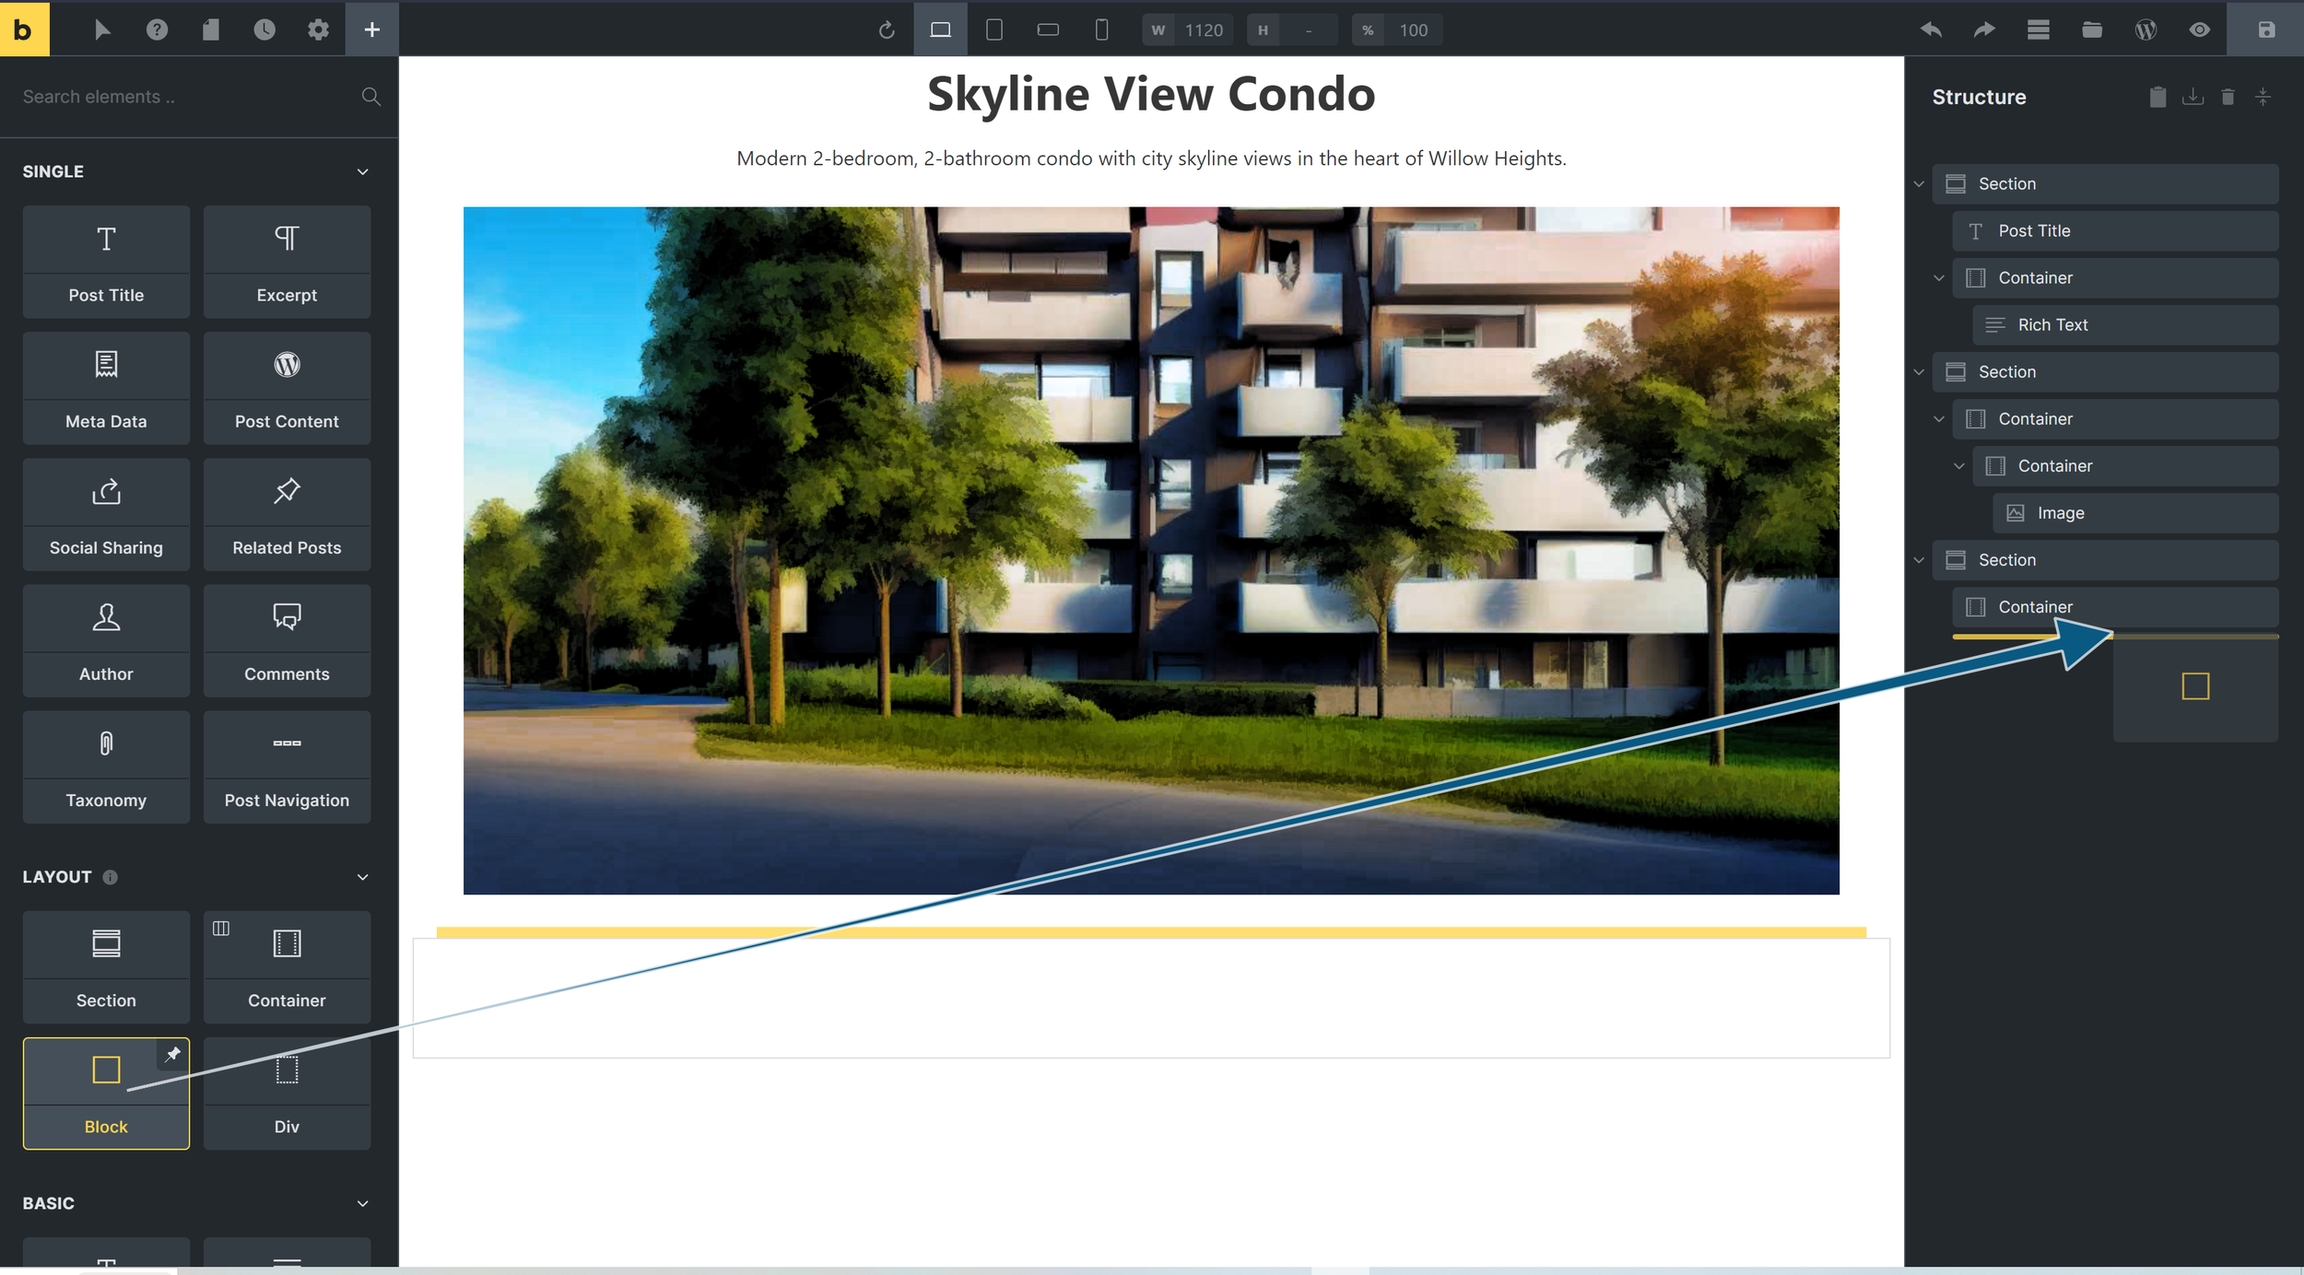
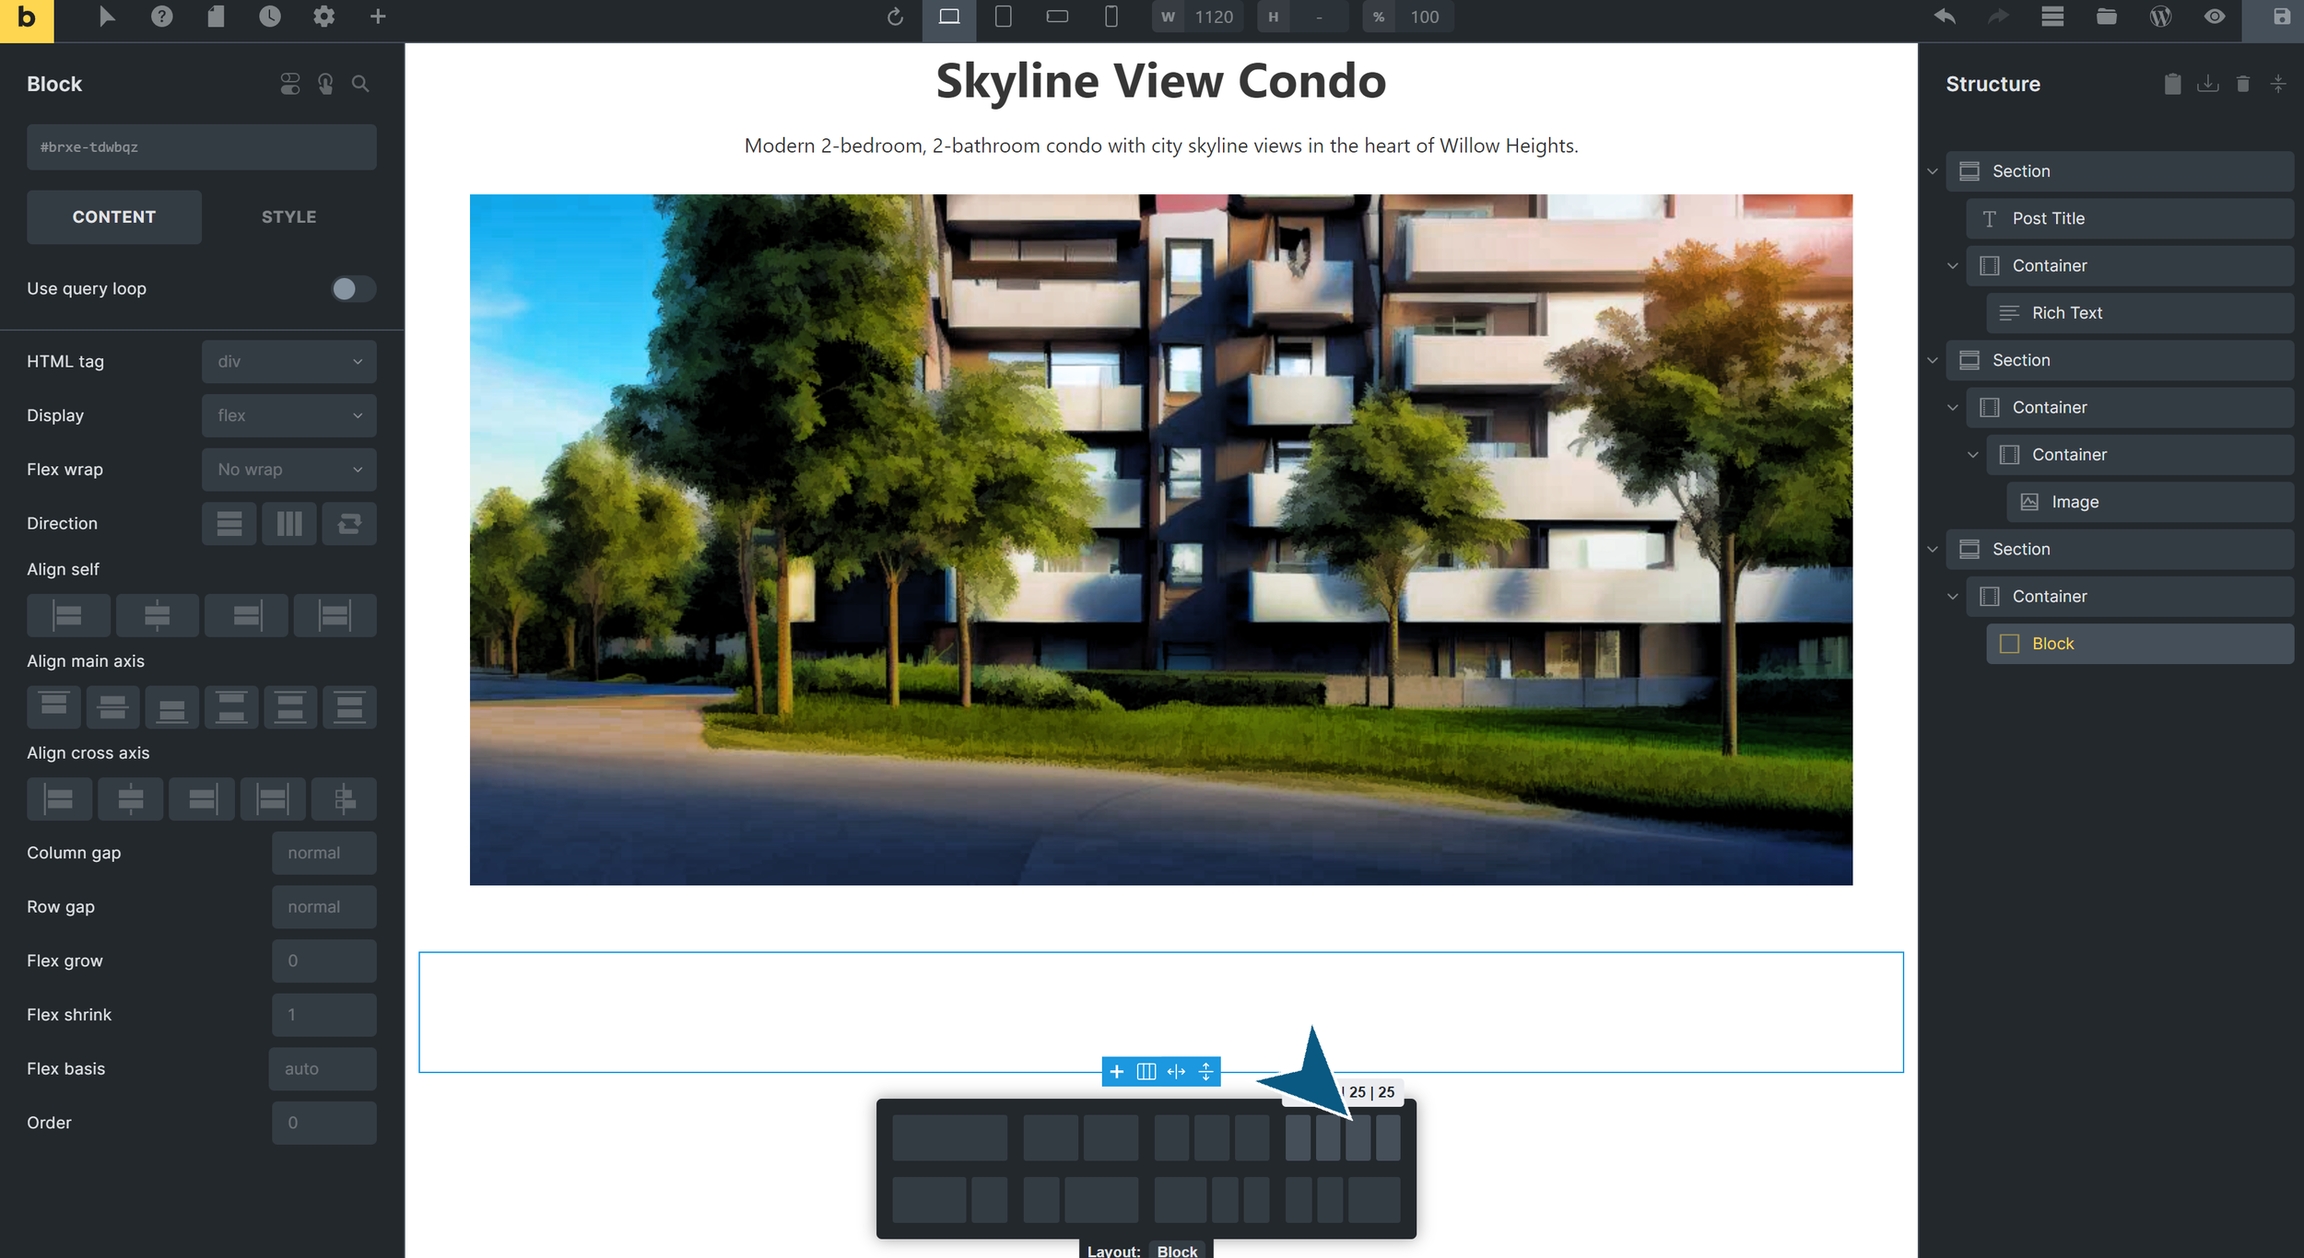
Create columns inside the block
Select the block on your right-hand pane, then select the column layout you want.
I chose the 4-column layout here.
Drag RT pins where you want to place them
It is easy to place them under corresponding columns in the right-hand pane.
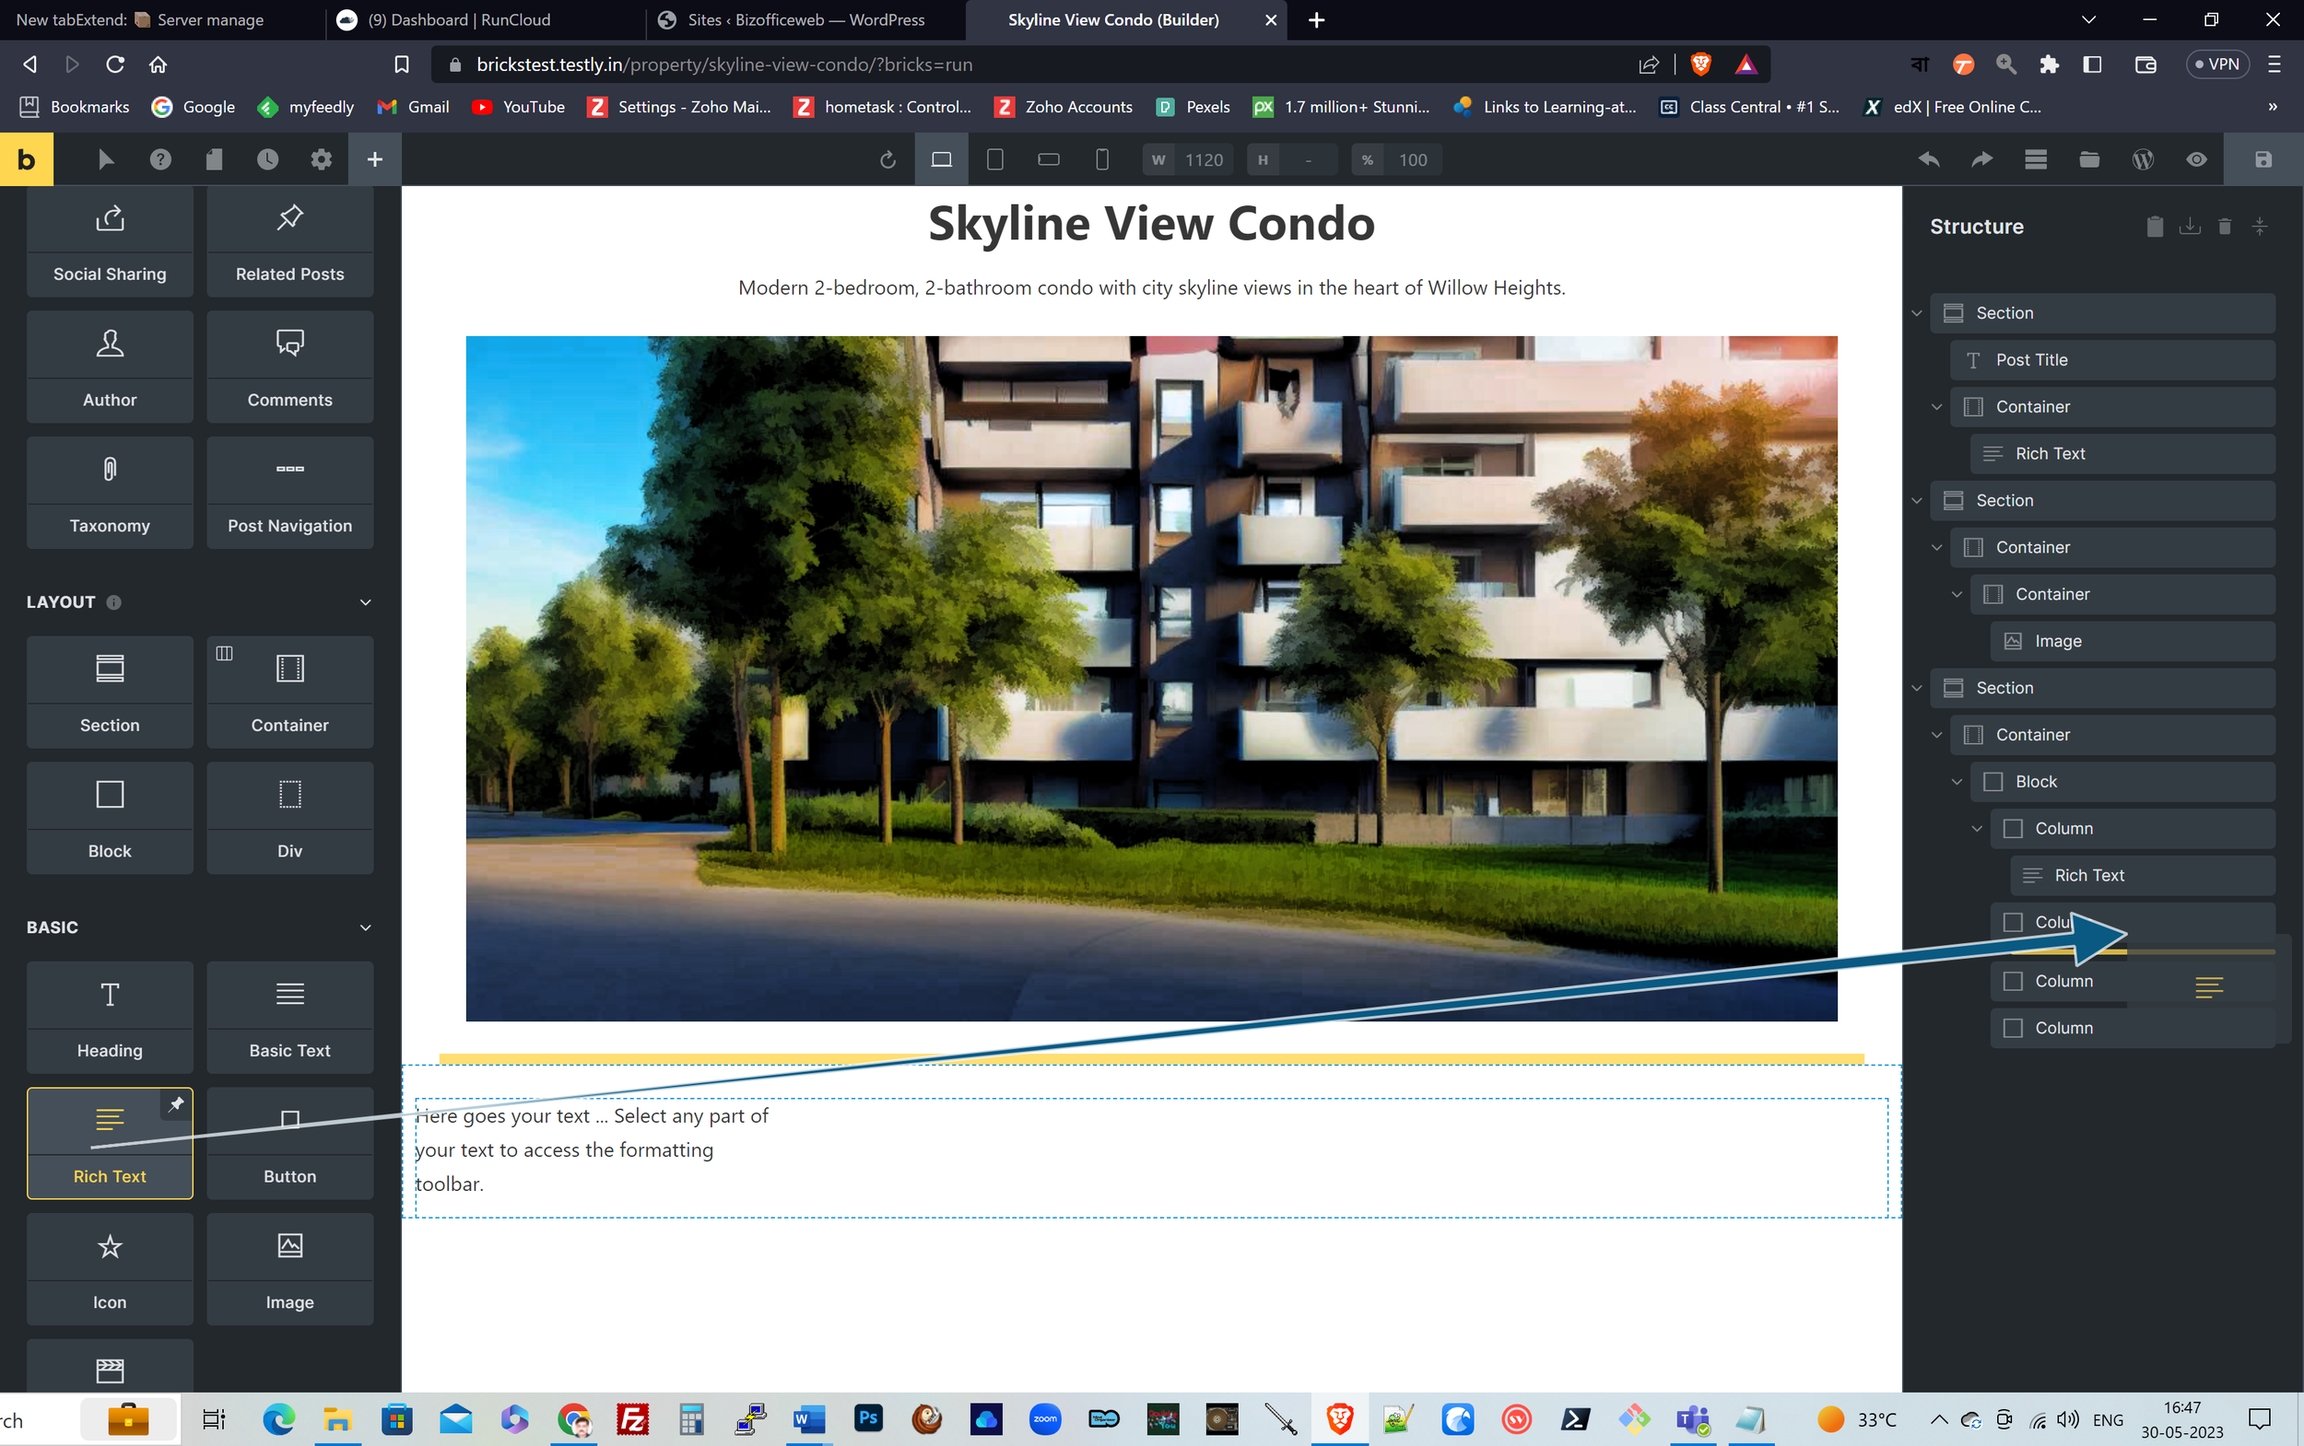
Place RT pins in all columns
Now that I have filled in RT pins in all the columns, I'll pull the custom field data in respective areas.
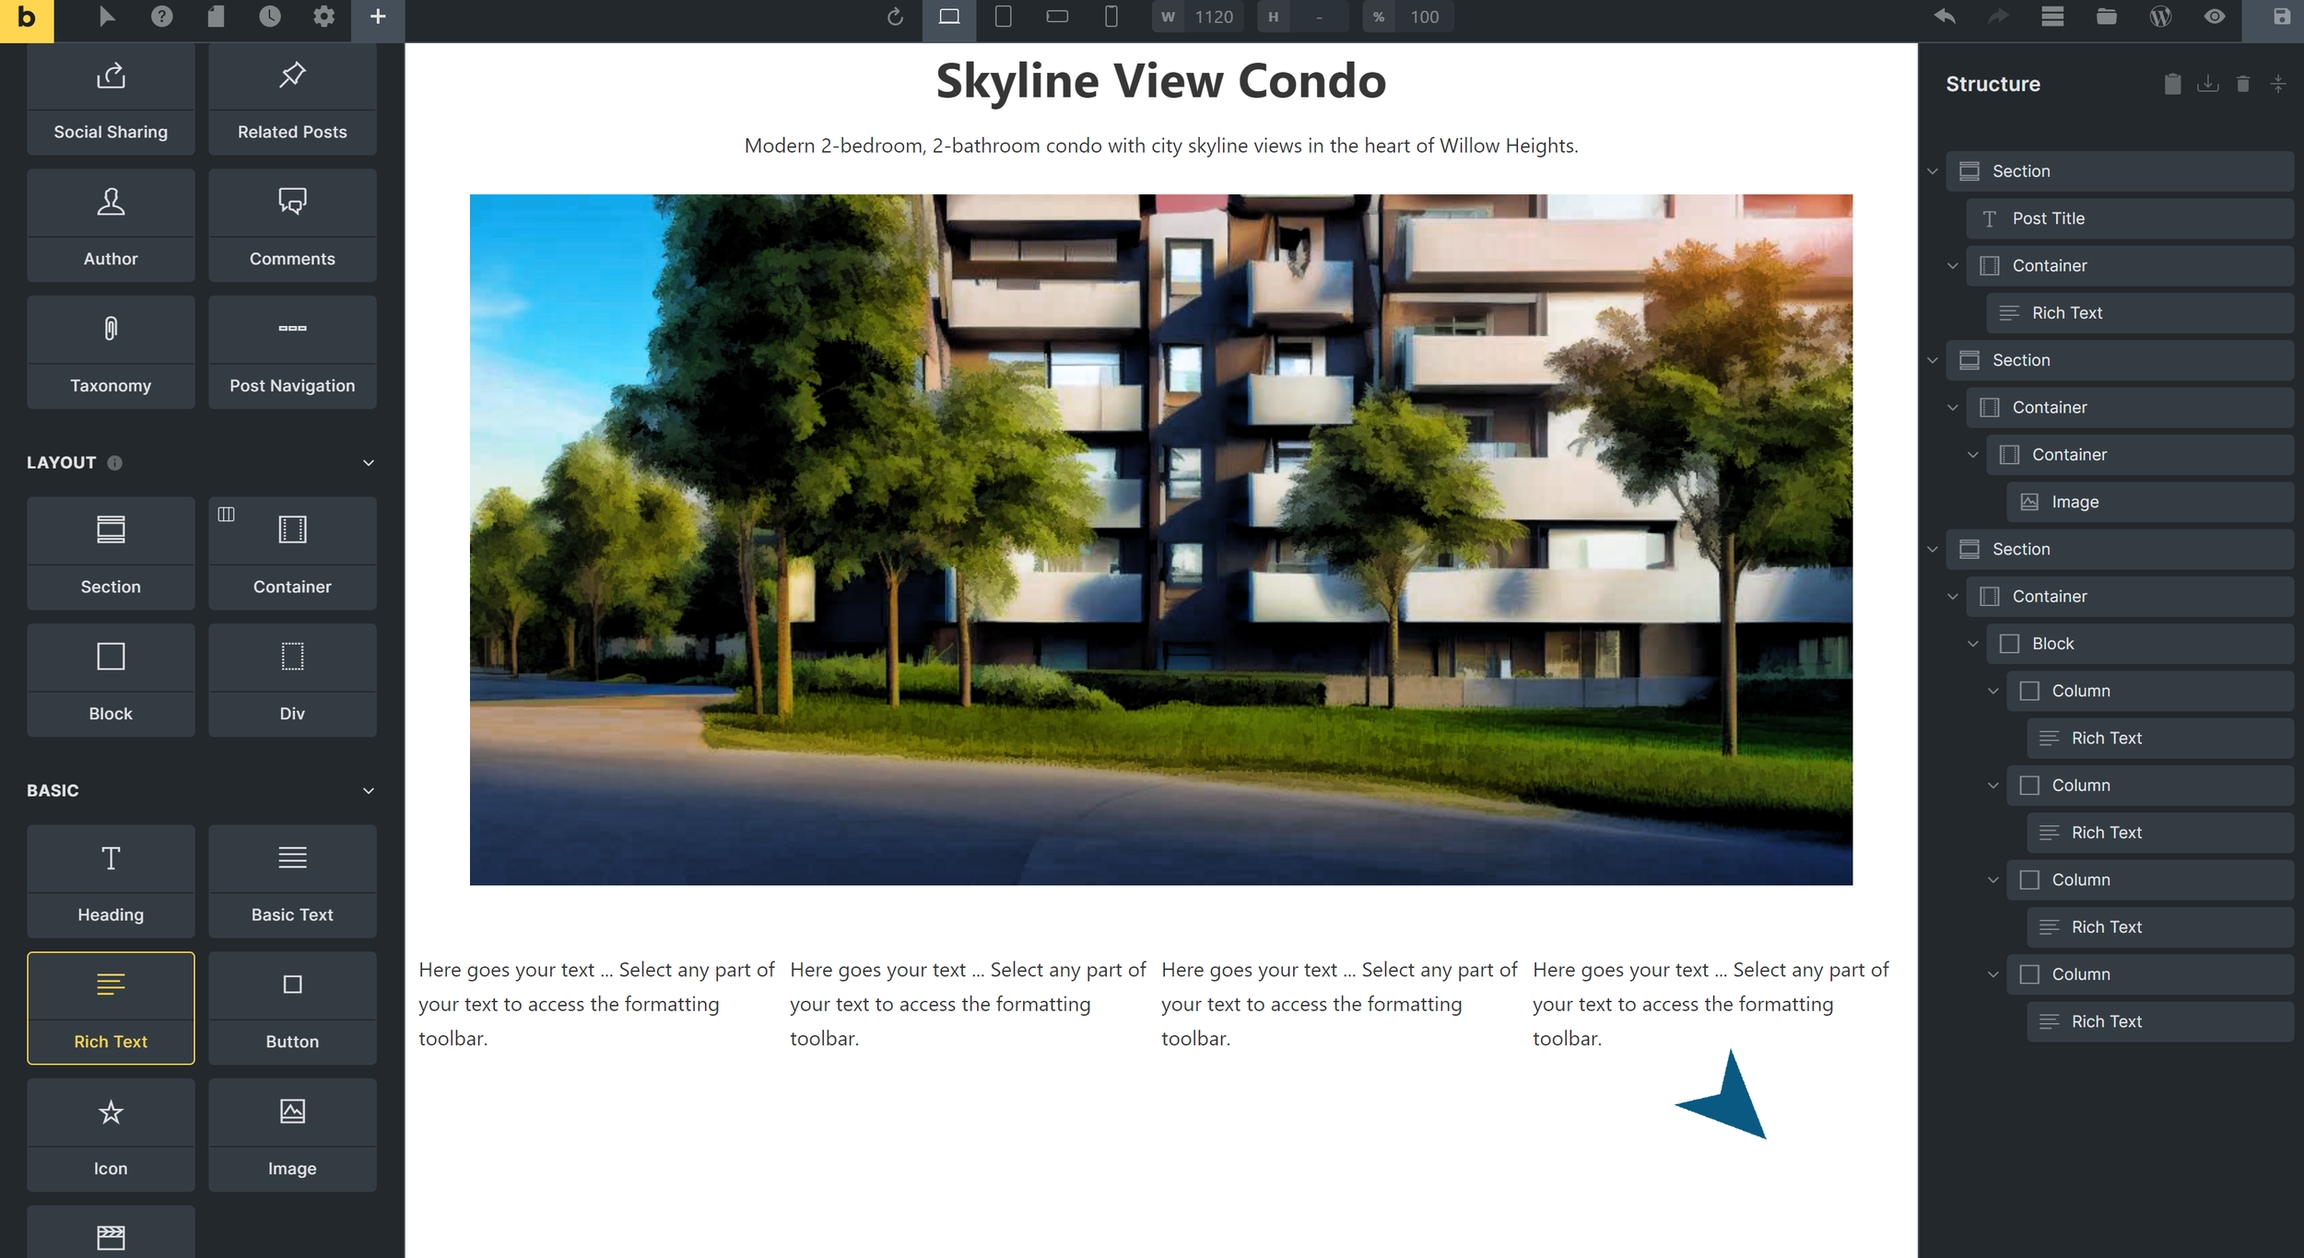
Check display on the frontend
On the frontend now you'll see placeholder text in all the columns where custom field data will come in.
Add the custom field data in the columns
First remove the placeholder text.
Select the custom field
Select the appropriate field to display from the 'lightning' dynamic data icon of the RT in the left pane. Save.
Style everything with Bricks. Save and publish.
Repeat until you have text in every column.
Do the same for all RT pins
Place custom fields in each column with the same process.
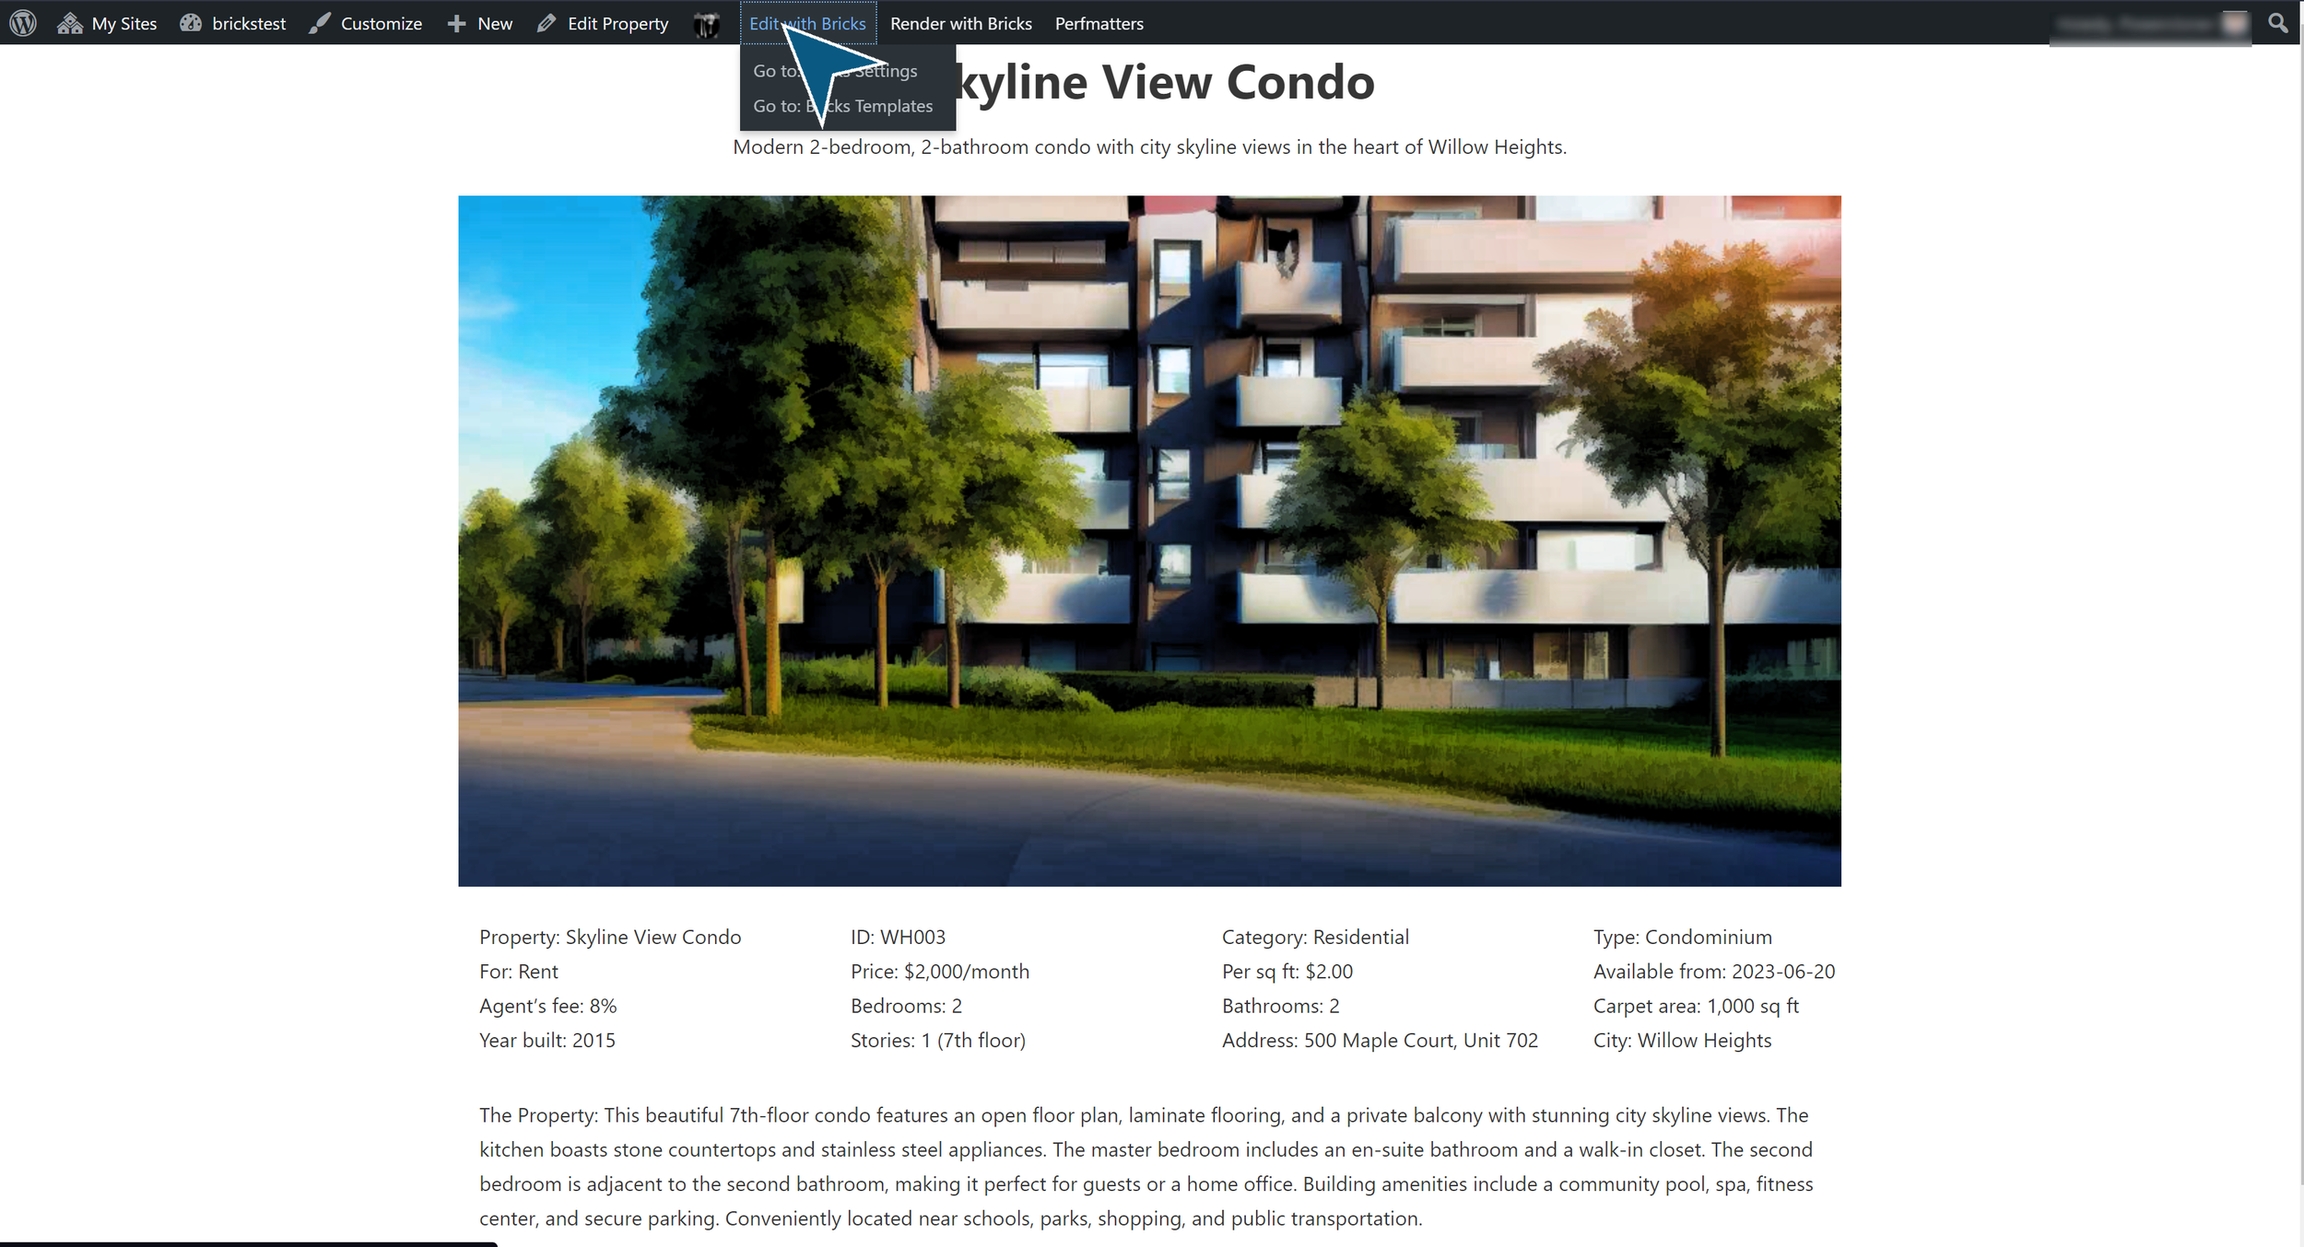
And here's the frontend of the Custom Post in Bricks
All information I put in the Meta box is correctly rendering on the frontend.
Last updated