> For the complete documentation index, see [llms.txt](https://docs.acpt.io/llms.txt). Markdown versions of documentation pages are available by appending `.md` to page URLs; this page is available as [Markdown](https://docs.acpt.io/integrations/elementor/nestable-field-blocks.md).

# Nestable field blocks

Learn how to work with Repeater and Flexible fields

Repeater and Flexible fields can be rendered in Elementor in a very similar way.

### Repeater fields

In this example, we consider a repeater with an email field called **email**.

Locate your Repeater field inside the ACPT block.

<figure><img src="https://3235524095-files.gitbook.io/~/files/v0/b/gitbook-x-prod.appspot.com/o/spaces%2Fiyf0tSKPgXiyoQ3zV3I6%2Fuploads%2Fgit-blob-5abc3acb87960ada4bc2f02a934ec10e35306f43%2FEdit-Pagina-di-esempio-with-Elementor%20(2).png?alt=media" alt=""><figcaption></figcaption></figure>

Once you have dragged it onto the canvas, a WYGIWYS editor appears in the controls section.

This represents **the loop element**.

How to render the element is 100% up to you.

To display a nested field inside the repeater, use this simple syntax:

```
%name_of_field%
```

**In this case, the box name is NOT needed.**

So, in our example, we will use `%email%`. This is the result:

<figure><img src="https://3235524095-files.gitbook.io/~/files/v0/b/gitbook-x-prod.appspot.com/o/spaces%2Fiyf0tSKPgXiyoQ3zV3I6%2Fuploads%2Fgit-blob-f250b9d92da739b5ca0aed68f45898aee828ce78%2FEdit-Pagina-di-esempio-with-Elementor%20(3).png?alt=media" alt=""><figcaption></figcaption></figure>

### Flexible fields

Flexible fields work in a very similar way.

Locate the flexible field and drag it onto the canvas.

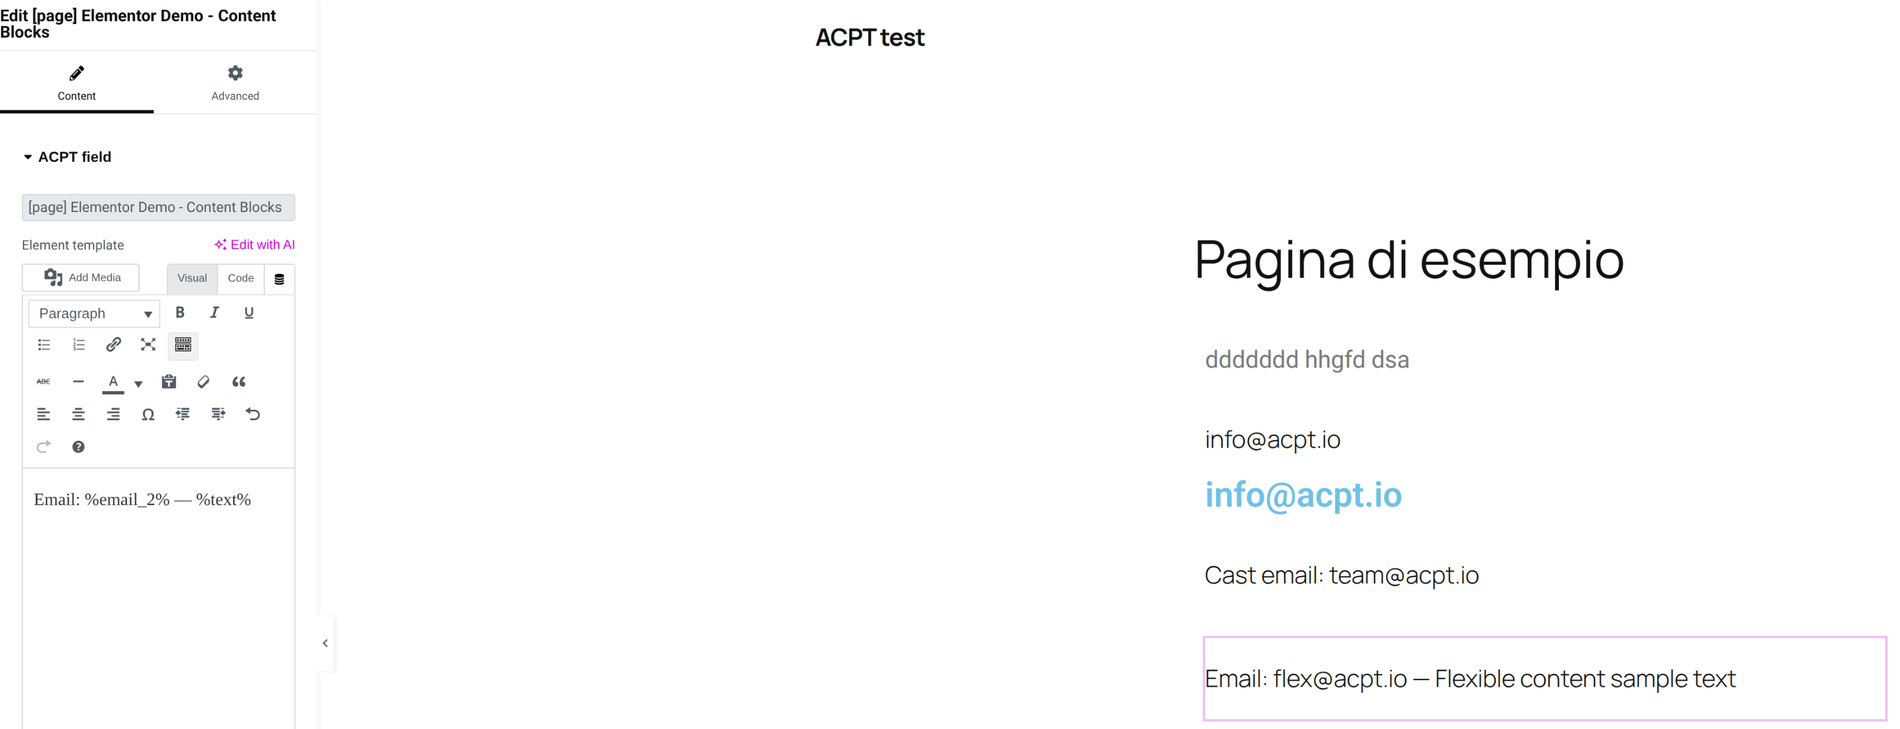
Along with the WYSIWYG editor to style the element in the loop, you need to choose **the block to render** (it's just below the editor):

<figure><img src="https://3235524095-files.gitbook.io/~/files/v0/b/gitbook-x-prod.appspot.com/o/spaces%2Fiyf0tSKPgXiyoQ3zV3I6%2Fuploads%2Fgit-blob-5db15a86cbb4f46639f2762a85f52017d3d7b9dc%2FEdit-Pagina-di-esempio-with-Elementor%20(4)%20(1).png?alt=media" alt=""><figcaption></figcaption></figure>

Once you select the block, you can style the loop element in the same way:

<figure><img src="https://3235524095-files.gitbook.io/~/files/v0/b/gitbook-x-prod.appspot.com/o/spaces%2Fiyf0tSKPgXiyoQ3zV3I6%2Fuploads%2Fgit-blob-e795ef3e8a9404d996c57e0a8016728d2ba59459%2FEdit-Pagina-di-esempio-with-Elementor%20(5).png?alt=media" alt=""><figcaption></figcaption></figure>

In the above example, we render **email and text fields in the loop element**.

As you can see, it's possible to style the field placeholders as any other text.

### Optional arguments

ACPT allows the user to specify additional options for certain field types to modify their default behavior inside the loop, by using the following syntax:

```
%field:arg1,arg2,arg3%
```

This is the full list of possible arguments:

<table><thead><tr><th width="219">Field</th><th width="146">Arguments</th><th width="189">Example</th><th>Behavior</th></tr></thead><tbody><tr><td><strong>RATING</strong></td><td>stars</td><td><code>%rate:stars%</code></td><td>Render as stars</td></tr><tr><td><strong>DATE, DATE RANGE, DATE TIME, TIME</strong></td><td>date format</td><td><code>%date:d/m/Y%</code></td><td>Modify the date format</td></tr><tr><td><strong>EMAIL, PHONE, URL</strong></td><td>link</td><td><code>%email:link%</code></td><td>Display as link</td></tr><tr><td><strong>EMBED, VIDEO</strong></td><td>width, height</td><td><code>%video:400,300%</code></td><td>Set the iframe size</td></tr><tr><td><strong>SELECT MULTI, CHECKBOX</strong></td><td>seperator</td><td><code>%list:-%</code></td><td>Set the string separator</td></tr><tr><td><strong>GALLERY</strong></td><td>columns</td><td><code>%gallery:4%</code></td><td>Set the number of elements per row</td></tr></tbody></table>
